GSuite (Google) configuration for DESK SSO
Follow the examples below to configure DESK SSO using GSuite (Google) as the SAML identity provider (IdP).
Important: Use this IdP-specific help as part of the entire SAML configuration procedure for DESK SaaS.
Configuring GSuite SAML application
-
Navigate to the GSuite Admin panel and choose Apps > SAML apps from the menu.
Choose SAML Apps - example 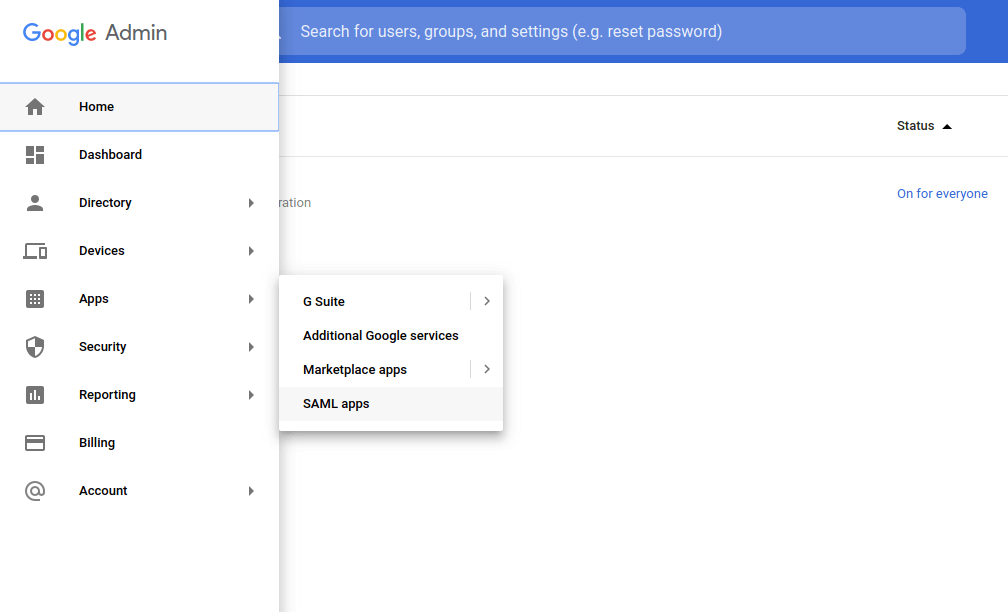
-
Choose to add a new SAML application to open a pop-up configuration wizard.
-
On the Enable SSO for SAML Application page, select Setup my own custom App.
Enable SSO for SAML Application - example 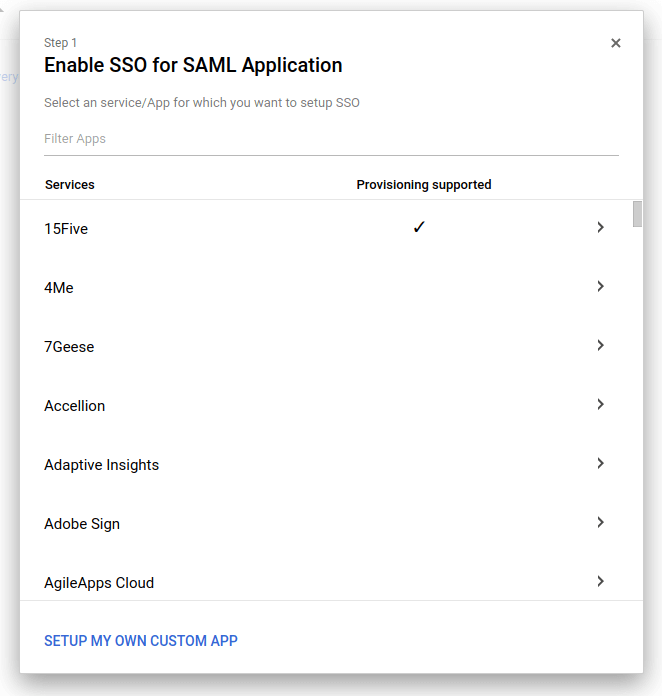
-
On the Google IdP Information page, in the IDP metadata section (Option 2), click Download to download the IdP metadata as an XML file. This will be needed when configuring single sign-on in DESK.
Google IdP Information - example 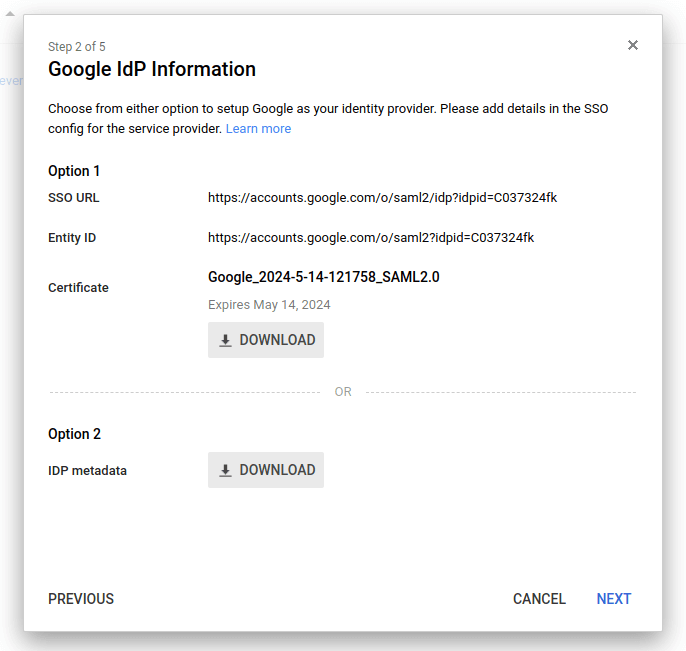
-
On the Basic information for your Custom App page, provide an intuitive Application Name.
Basic information for your Custom App - example 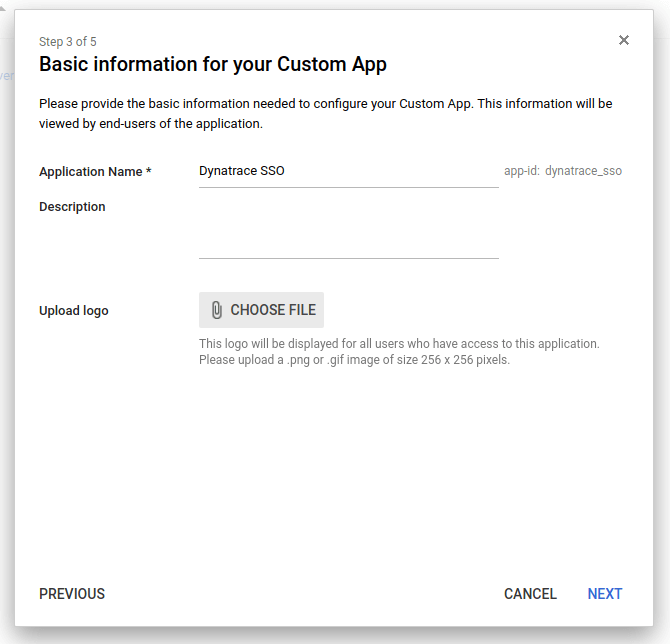
-
On the Service Provider Details page, enter Service Provider (SP) details as follows:
ACS URL https://sso.desk.com:443/saml2/sp/consumer Entity ID https://sso.desk.com:443/saml2/login Start URL Leave this empty for now Signed Response Select this checkbox. NameID Leave this as is. NameID format Leave this as is. This information can also be found in DESK SSO metadata at https://sso.desk.com/sso/metadata.
Service Provider Details - example 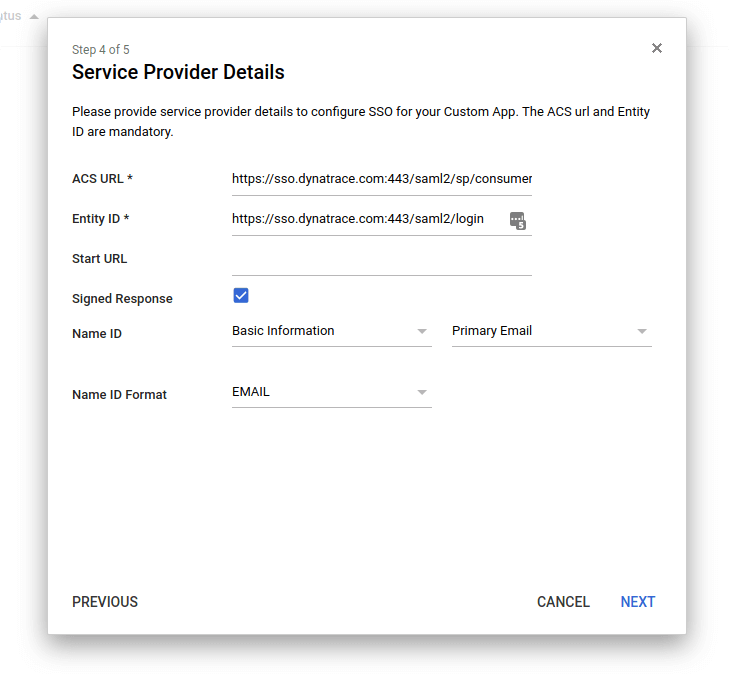
-
On the Attribute Mapping page, add mappings for
FirstNameandLastNameas shown in the example. (You'll need to add a third mapping later forGroups, which is described in the Preparing group mapping section that follows.)Attribute Mapping, `FirstName` and `LastName` - example 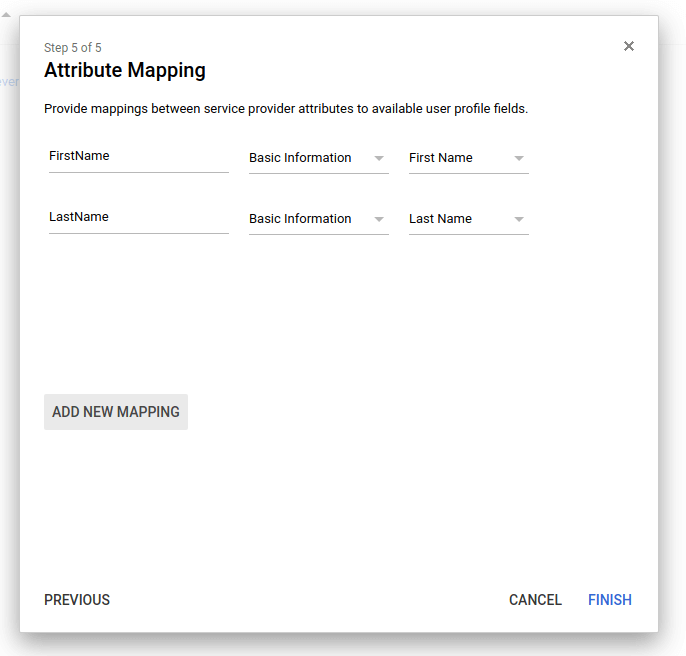
Preparing group mapping
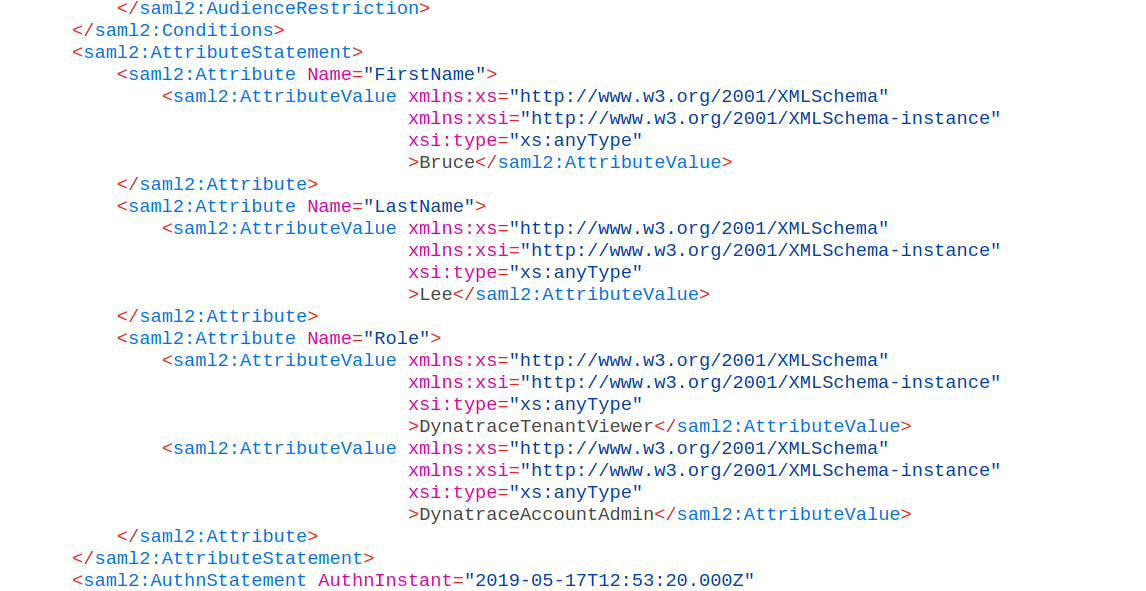
By default, GSuite doesn't offer a way to send user groups through SAML. This is required for mapping to certain groups/permissions in DESK. The only fields that can be delivered by SAML are as in this example:
This doesn't allow the GSuite administrator to provide a list of groups or permissions that the user should have in DESK.
Google suggests that you add a custom schema to user accounts. This enables you to add multiple group entries that, upon being sent via SAML, are mapped correctly to groups and permissions in DESK.
-
Navigate to the Google Directory API:
https://developers.google.com/admin-sdk/directory/v1/reference/schemas/insert?authuser=1Example 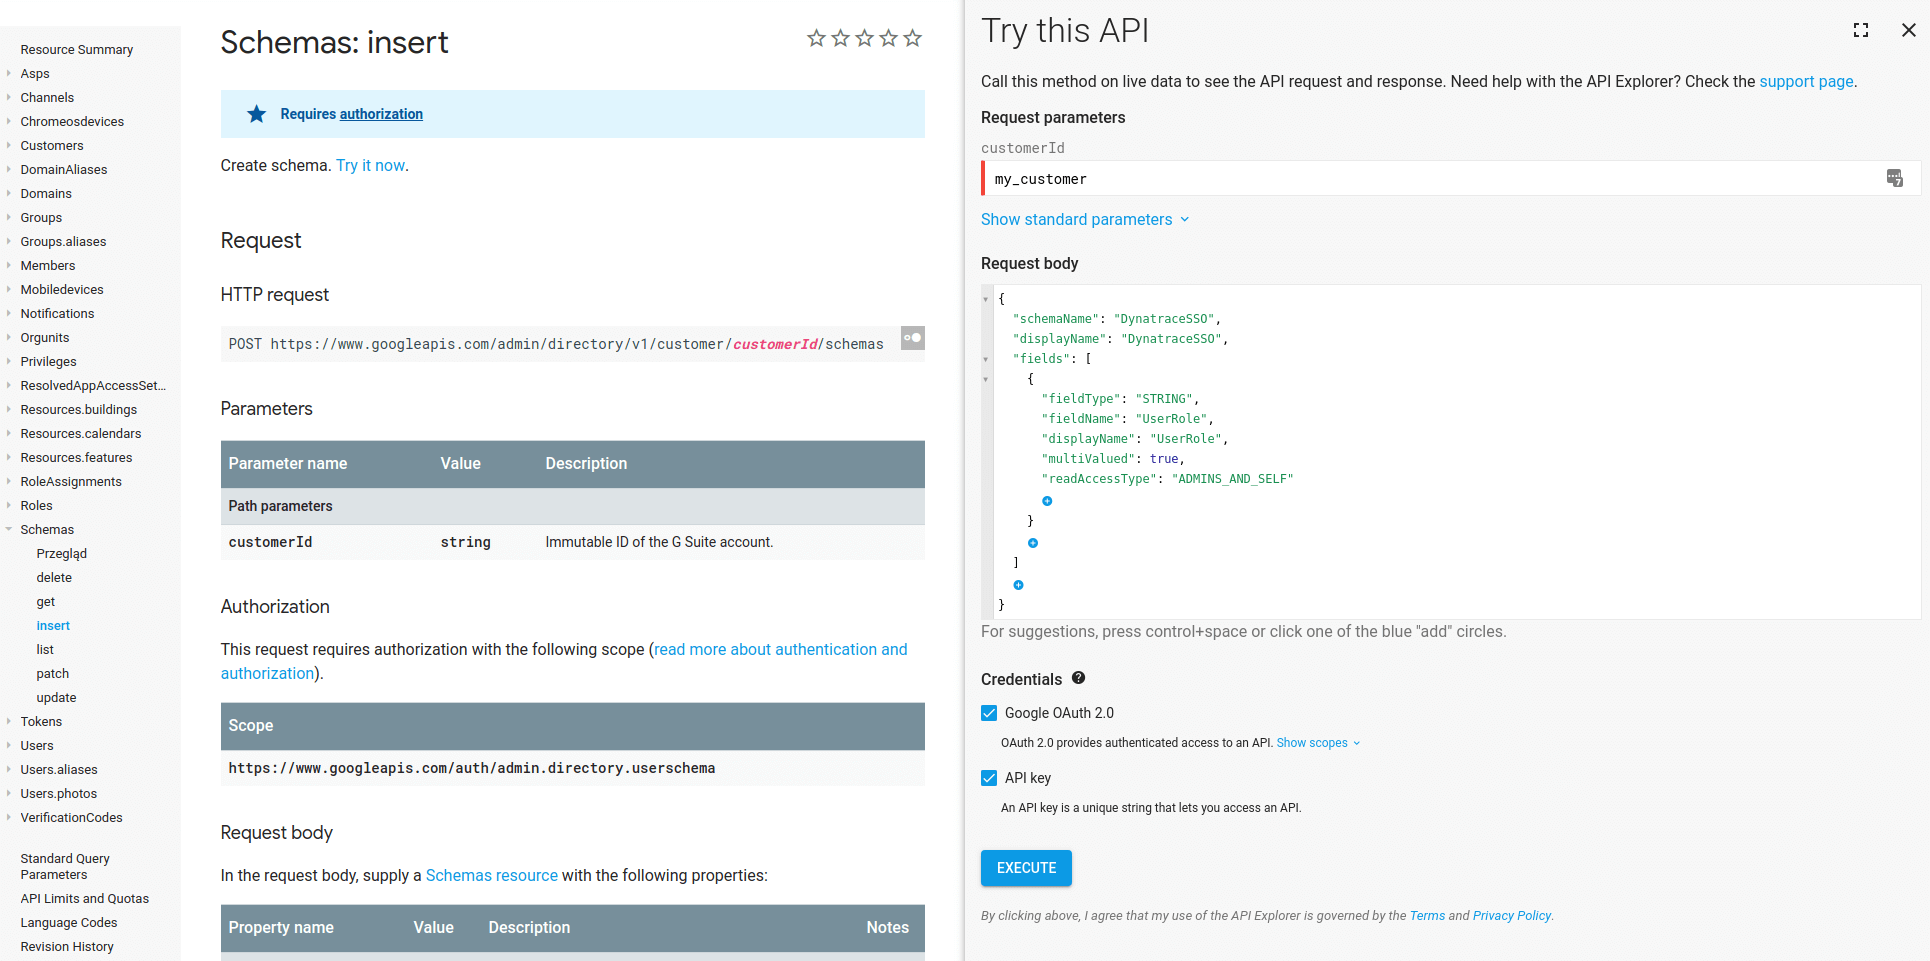
-
Make the following schema edits.
- Set customerId to
my_customer, which automatically uses this Google account's ID. - We suggest the following schema (in JSON) for DESK:
{
  "schemaName": "DESKSSO",
  "displayName": "DESKSSO",
  "fields": [
    {
      "fieldType": "STRING",
      "fieldName": "UserRole",
      "displayName": "UserRole",
      "multiValued": true,
      "readAccessType": "ADMINS_AND_SELF"
    }
  ]
}
- Set customerId to
-
Click Execute to add the new schema for all users.
The new configuration will now be selectable as a SAML attribute for users. -
In the GSuite Admin panel, navigate back to Apps > SAML apps as before.
Choose SAML Apps - example -
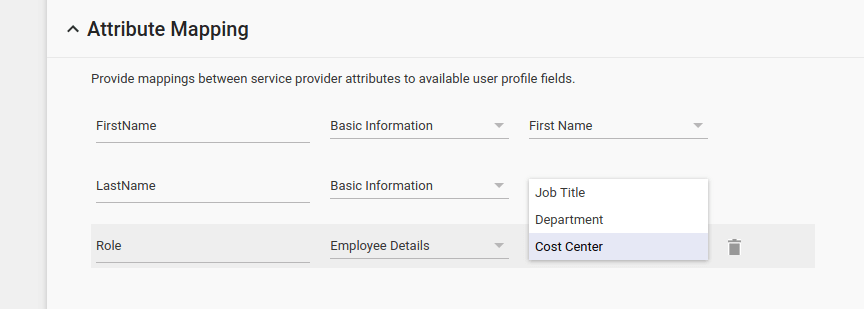
Click through to Attribute Mapping, where the mappings for
FirstNameandLastNamewere added previously. -
Set the
Roleattribute toDESKSSOandUserRole.Adding the Role attribute - example 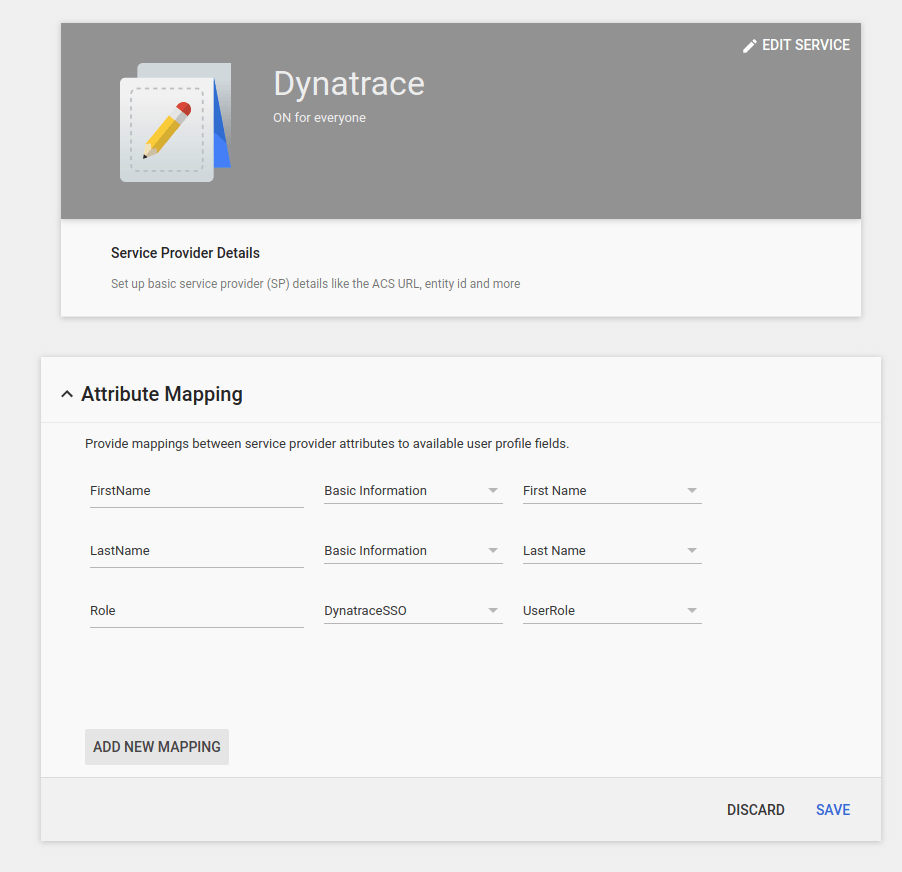
This will make Google send all of the entries in DESKSSO/UserRole for a certain user as an attribute in SAML, which DESK SSO will use to assign permissions upon a federated login. The user roles can be applied to each user separately using the user configuration screen in GSuite.
Assigning user roles
User roles can be applied to every user separately using the User information screen in GSuite.
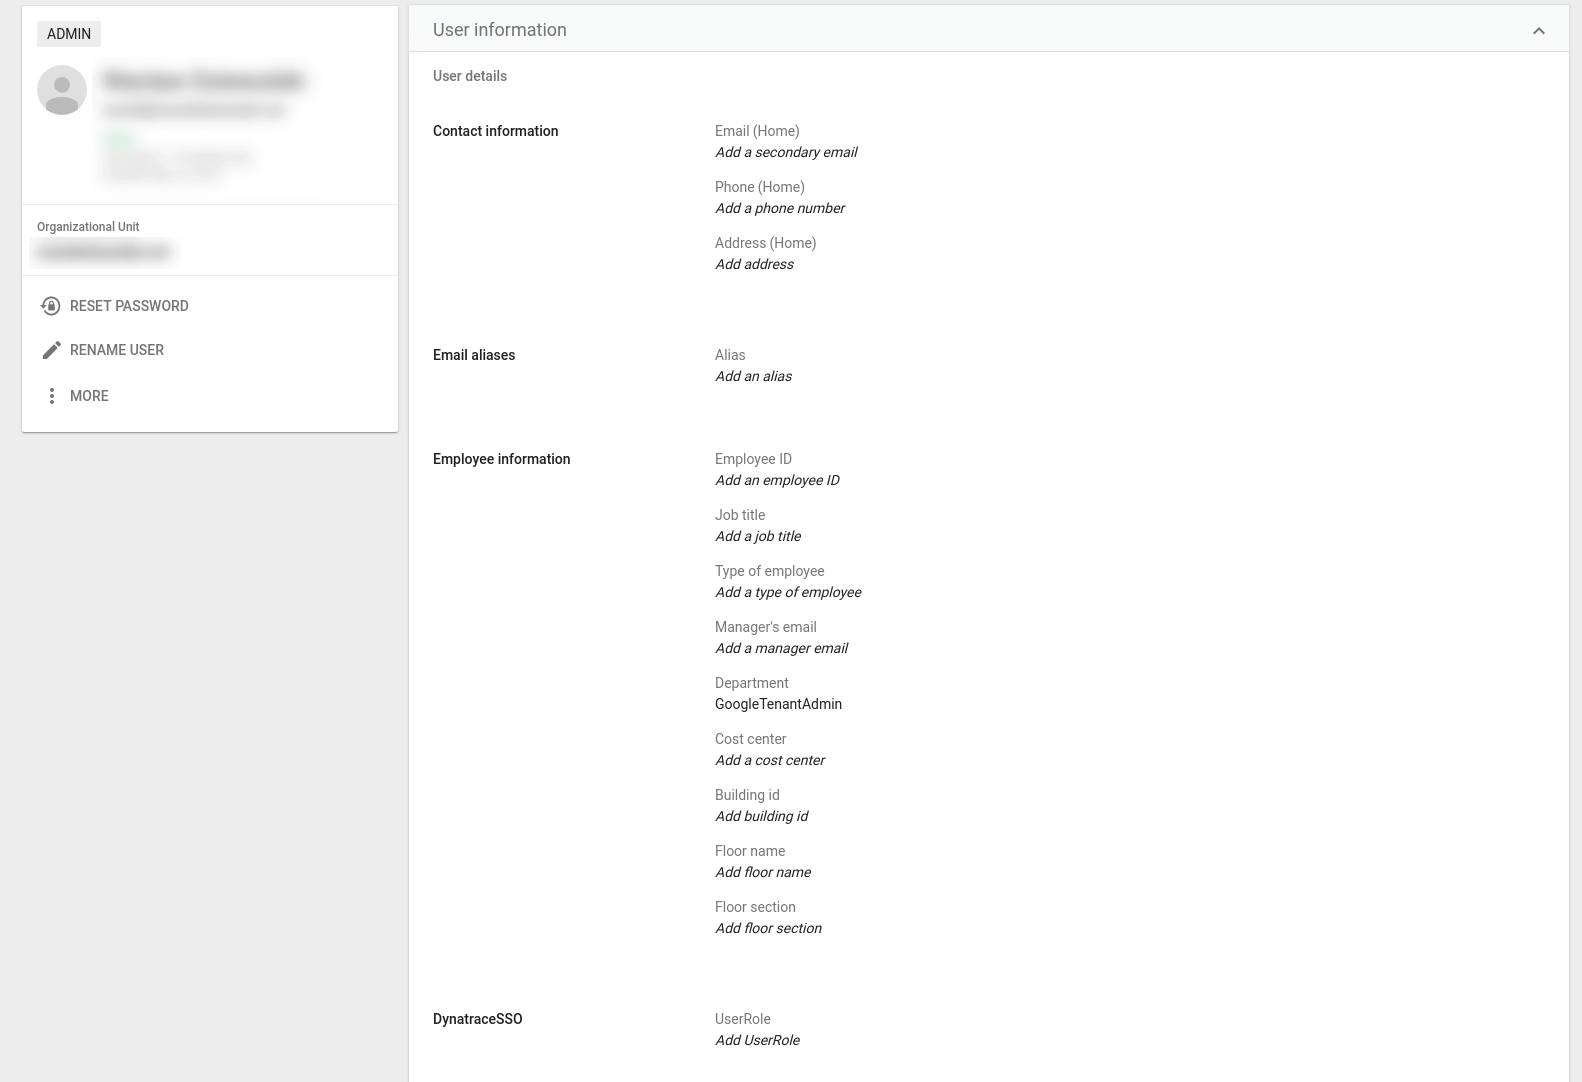

You can map these roles in DESK BAS to certain permissions as needed.
Note that in GSuite, UserRole has to have the same value as the Security group claim name in BAS (for example, DESKTenantViewer and DESKAccountAdmin).
Example
Say you've set up two groups in BAS and have a group called Main Account Admin, which is assigned a federated user by the Security group claim name DESKAccountAdmin.
If you now attach the DESKAccountAdmin UserRole to any user in GSuite, that user will be assigned the permissions of the Main Account Admin group in BAS.

Upon setting up the SAML apps configuration in GSuite correctly, the SAML request sent from GSuite should contain the configured groups as SAML attributes.