Browser clickpath events
When you record a browser clickpath, your interactions with your web application are captured as a series of events. There are different event types to simulate interaction and control the clickpath, for instance, navigating to a URL, a click, selecting an option, entering information, or a JavaScript snippet. Besides the type, events have different properties, like the target (consisting of locators to identify web elements on a page) and the wait strategy.
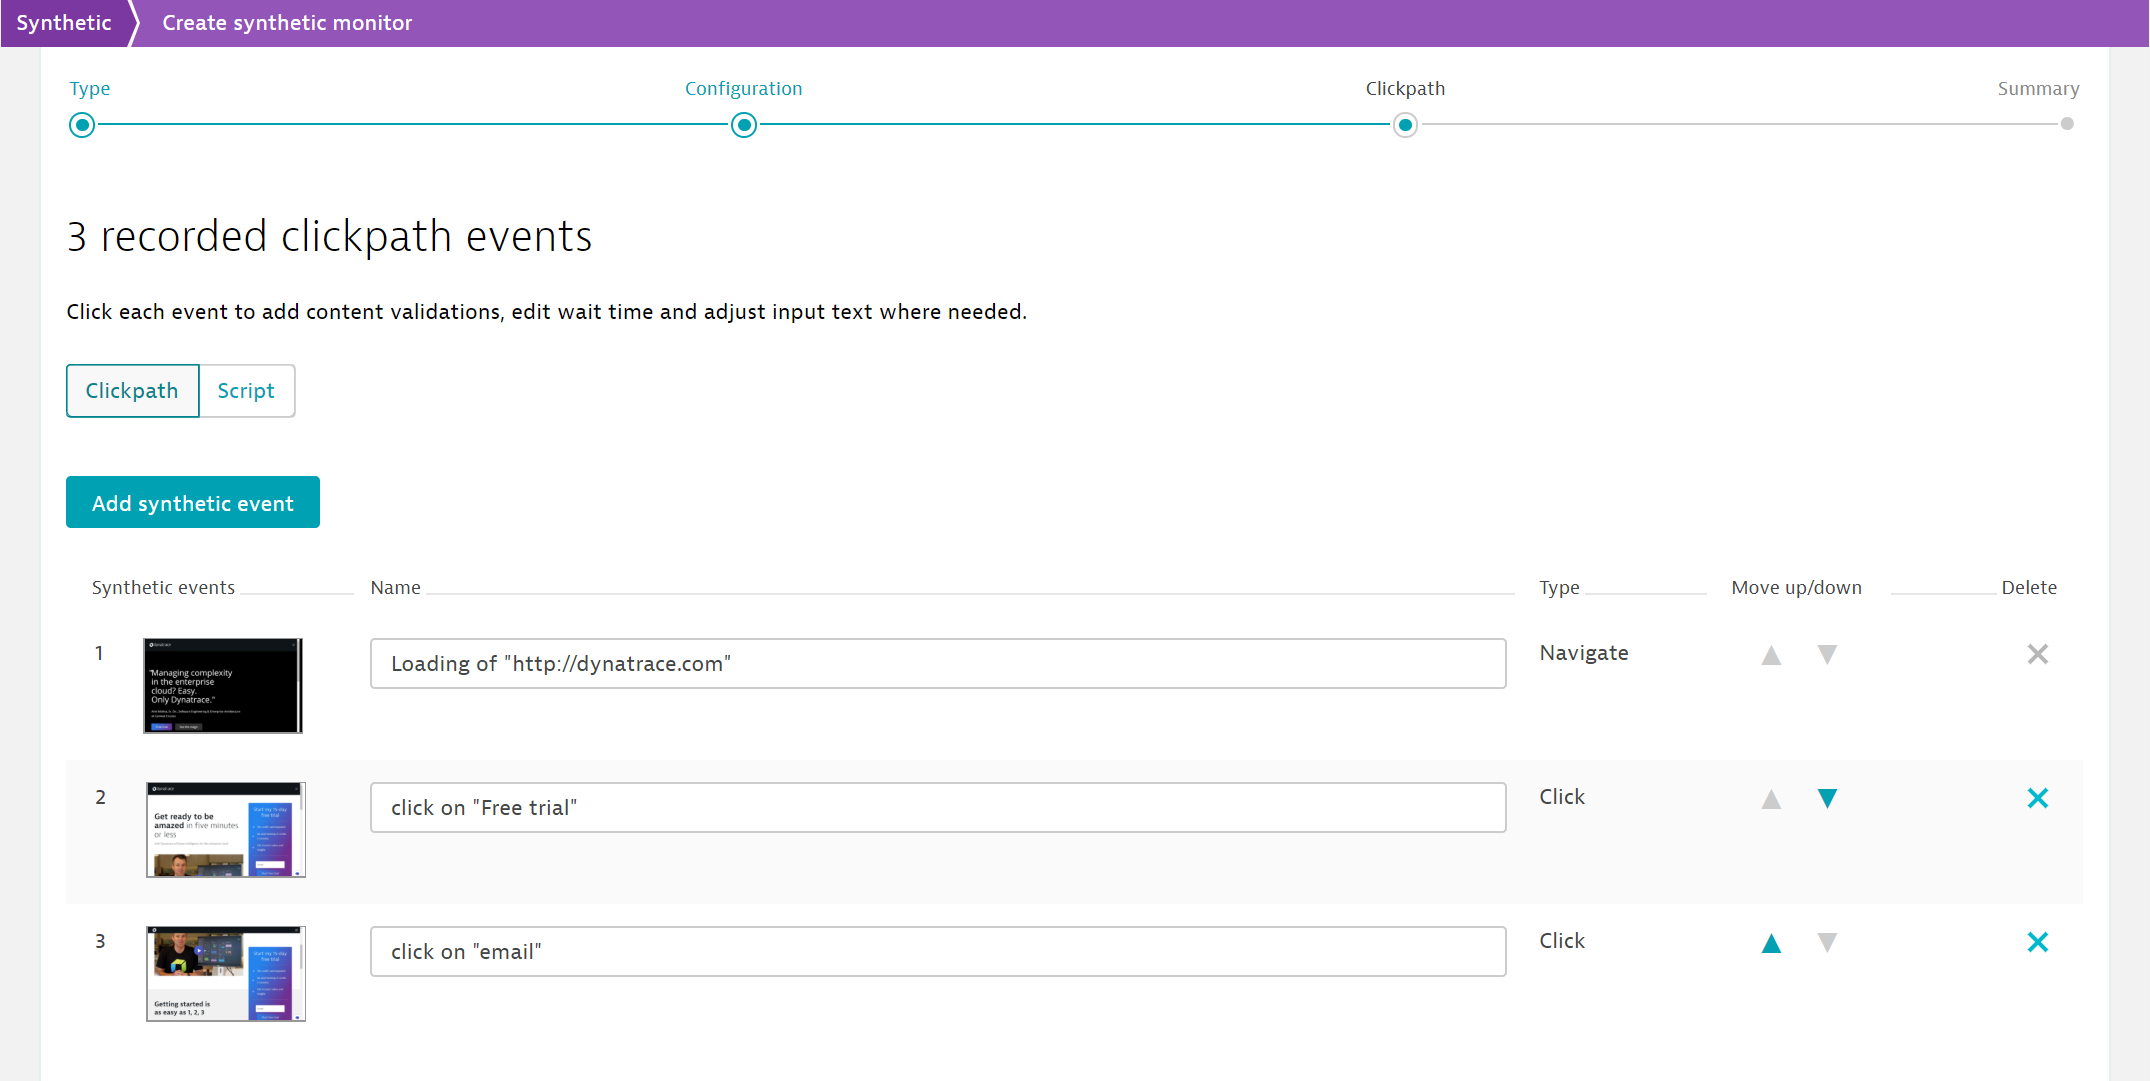
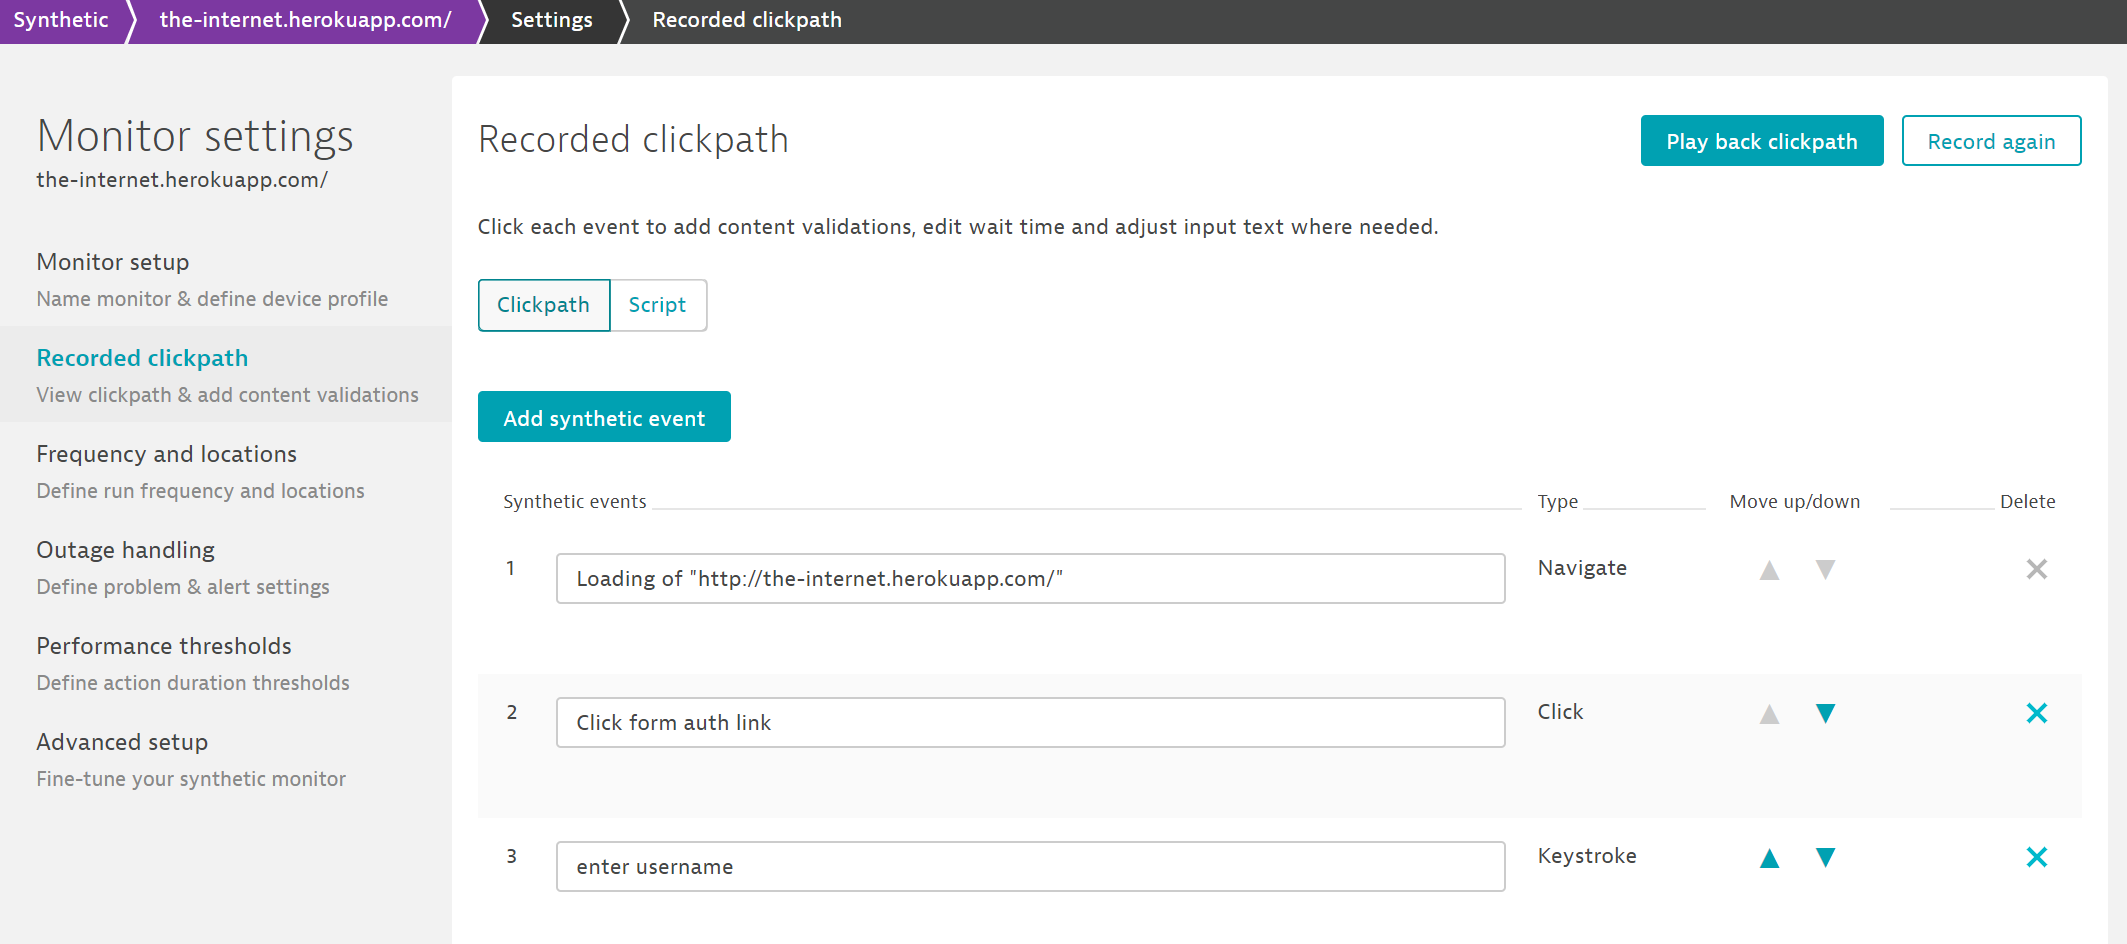
Browser clickpath event types and their properties are described below. Clickpath events are editable during initial configuration or at any point later in edit mode (see the images below). You can edit, reorder, delete, and add events.
A synthetic event is not the same thing as an action—only events that trigger web requests are called actions, so your script might have more events than actions. Synthetic actions (similar to user actions in Real User Monitoring) hold the performance data collected during clickpath runs.
Navigate
The Navigate event simulates entering a URL in the address bar of a browser and then loading the page. Single-URL browser monitors are comprised of a single Navigate event.
In clickpaths, the first event is automatically created as a Navigate event. The initial Navigate event of a clickpath cannot be deleted. You can also insert a Navigate event into your recorded clickpath by clicking Add synthetic event and choosing the appropriate event it should follow.
Going to a new web page by clicking a link in the current web page creates a Click event in desktop profiles (or in mobile profiles, a Tap event), not a Navigate event.
Please see the sections below on wait and validation controls.
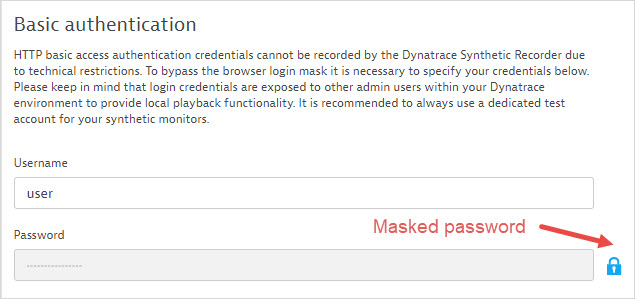
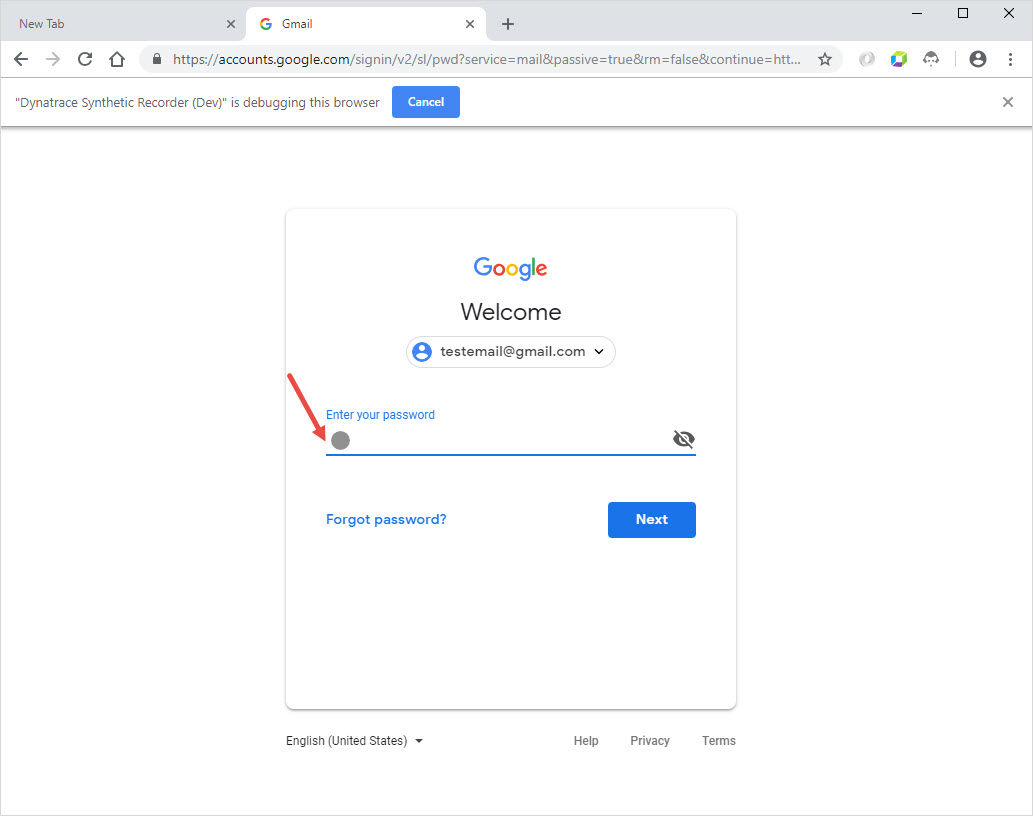
Basic authentication
You can choose to automate logging in to the specified URL using basic authentication—provide a Username and Password. Click the "lock" icon next to the password field to mask the password. This means that the actual password is not stored in the field, but an ID representing it. The password itself is stored by DESK and found by the ID. If you unmask the password (change the ID), you will need to enter the password again.
To automate form-based login, begin by recording your clickpath. During recording, type in your username and password as usual. Your login credentials will be securely recorded and stored so that logging in is automated during monitor runs.
Click
In browser monitors, the Click event defines where on a page to record a mouse click. It is inserted when you click an element such as a link, button, or field.
Please see the sections below on wait and validation controls.
The Click event interacts with a specific element on the web page. See the information on locators below to define how an element should be found.
Tap
In mobile device profiles (including tablets, laptops with touch, and custom devices specified as mobile), the Tap action defines where on a page to record tapping the device screen with a fingertip. For example, a Tap is inserted when you tap a hyperlink, button, or to select a field.
When recording on mobile device profiles, the cursor changes to an icon that represents a fingertip.
Please see the sections below on wait and validation controls.
The Tap event interacts with a specific element on screen. See the information on locators below to define how an element should be found.
Keystroke
The Keystroke event captures the string you type in a field on the web page.
The string is recorded in the Text value field, which can be edited. Simulate blur event (enabled by default) defines whether a blur event is simulated, which is usually when the text field loses focus.
Click the "lock" icon next to the field to mask the string. This means that the actual string is not stored in the field, but an ID representing it. The string itself is stored by DESK and found by the ID. If you unmask the field (change the ID), you will need to reenter the string.
When you type text in a masked field (e.g., a password), the Text value is automatically encrypted.
Please see the sections below on wait and validation controls.
The Keystroke event interacts with a specific element on screen such as a form field. See the information on locators below to define how an element should be found.
Select option
The Select option event describes the use of drop-down lists in a clickpath.
The Index describes the position of the chosen item from the top; the first item in a list is always annotated 0. The Value field shows the text value of the item selected.
Click Add another selection to add another item to select in the same list. You can delete selected options as required.
Please see the sections below on wait and validation controls.
The Select option event interacts with a specific element on screen. See the information on locators below to define how an element should be found.
JavaScript
The JavaScript event allows you to execute snippets of JavaScript as part of your clickpath monitors.
With JavaScript events, you can create clickpaths for scenarios with some dynamic parts where it might be necessary to react on the page, for example:
- Login flows including random security questions
- Complex date selectors
- Pages using A/B testing
- Signups or product order workflows
- Custom validations
In the editor provided, define your JavaScript snippet, the target window, and wait strategy. The API that allows you to store and retrieve values, control JavaScript event outcome, or skip execution is described below.
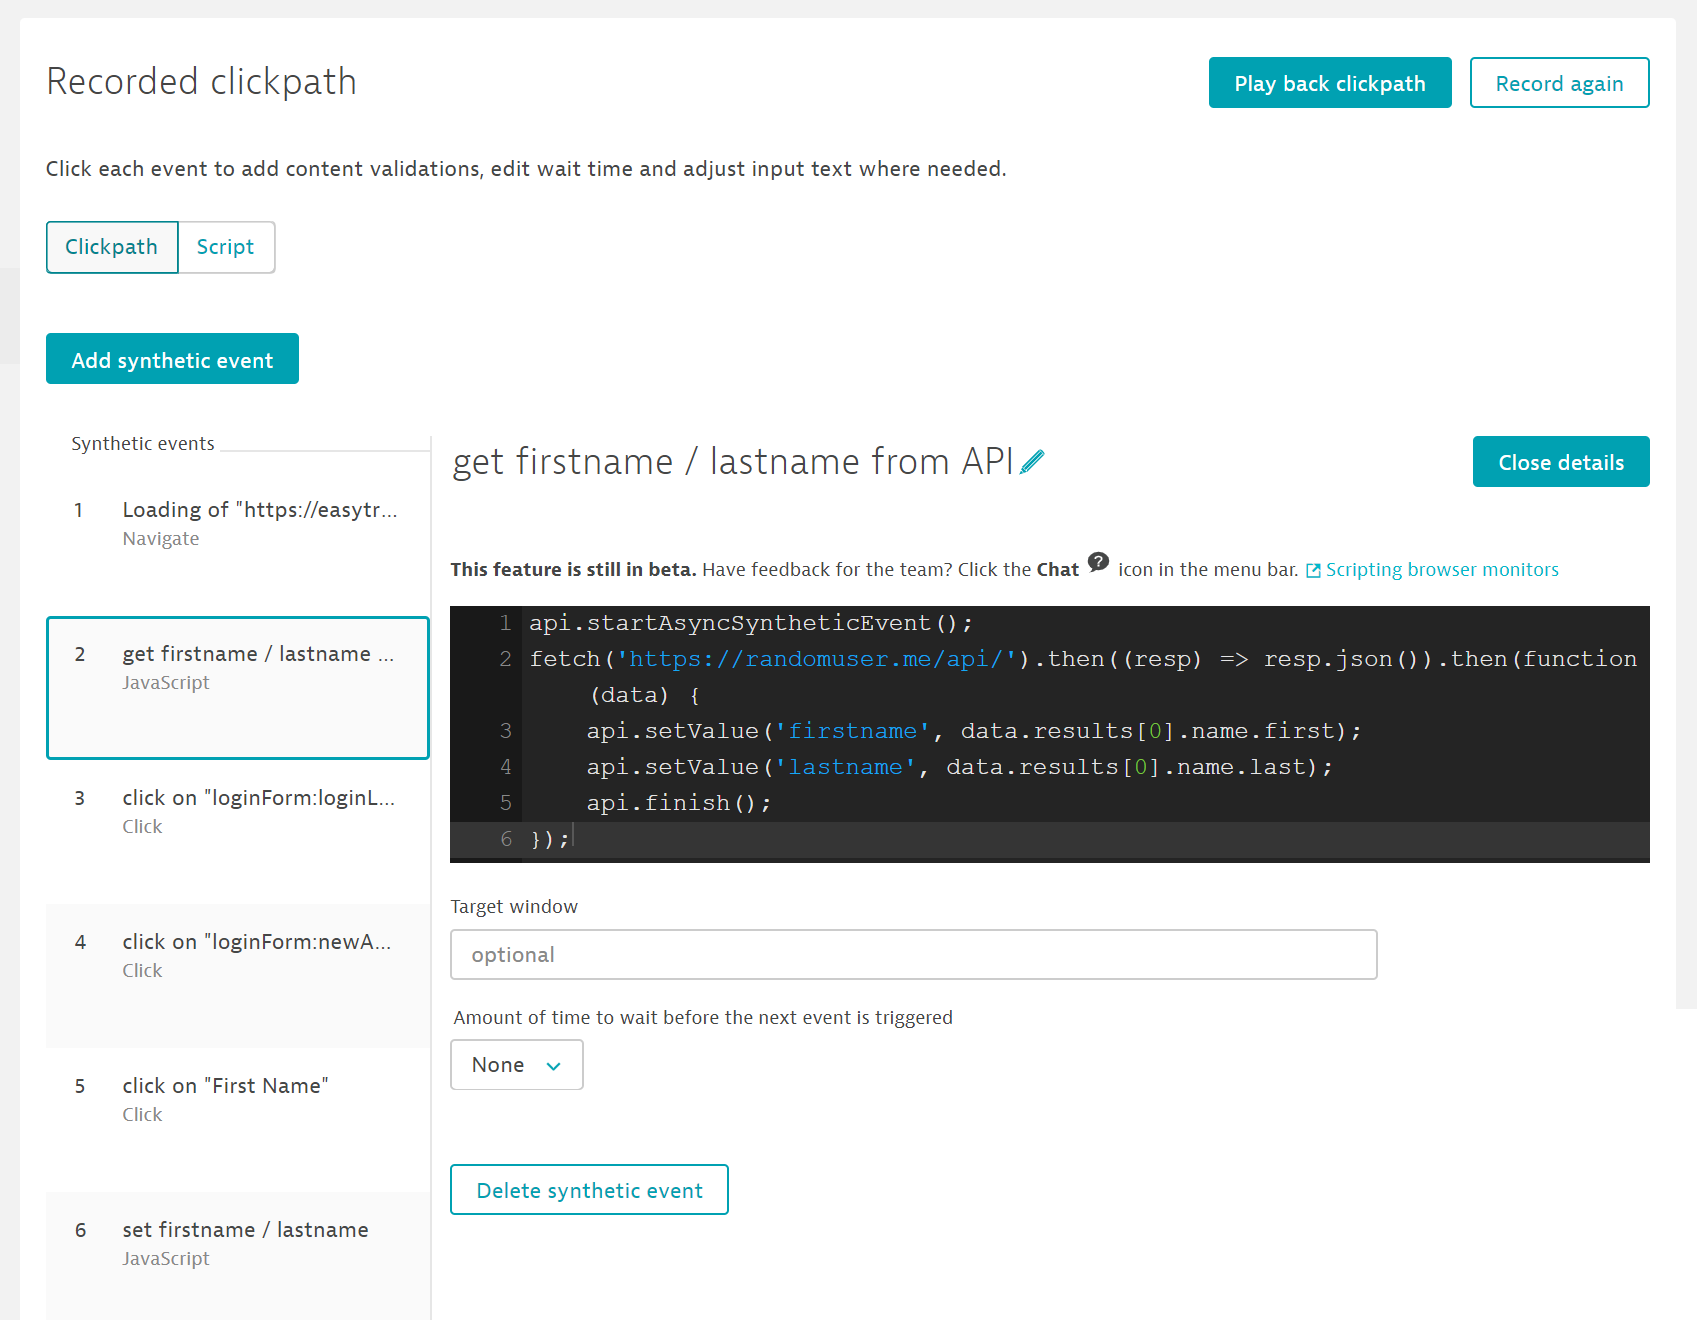
JavaScript event API
The JavaScript event offers a basic API that allows you to:
- Store and retrieve values across events (steps).
api.setValue(key, value)—Sets a local value.api.getValue(key)—Gets the local value of the key that had been previously set byapi.setValue.api.getValues—Returns an object holding the key-value pairs that had been previously set byapi.setValue.
- Mark events as failed or finished.
api.fail(message)—Marks the event as failed, providing message as the reason and marks the test execution as failed.api.finish()—Finishes the JavaScript event so that the next event is executed.api.startAsyncSyntheticEvent()—Causes the JavaScript event to wait for a later call ofapi.finish()orapi.fail()to end it.
- Skip synthetic events.
api.skipNextSyntheticEvent()—Skips execution of the next event.api.skipNextSyntheticEvents(n)—Skips execution of the next n consecutive events.api.skipSyntheticEvent(eventIndex)—Skips execution of the event with the indexeventIndex.api.skipSyntheticEvents(eventIndexes)—Skips execution of multiple events; the arrayeventIndexesspecifies the indexes of events to skip.
- Basic logging
api.info(message)—Logs the message using the “info” log level.api.warn(message)—Logs the messageusing the “warning” log level.api.error(message)—Logs the message using the “error” log level.
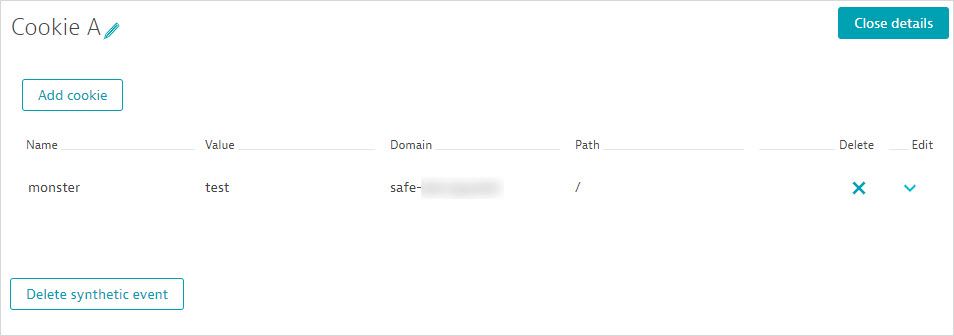
Cookie
Cookies enable you to store browser state information on the client side so that each monitor execution is based on the same state and you can accurately monitor a performance baseline.
You can set cookies in Additional options when creating a browser monitor or in Advanced setup in edit mode. These cookies are valid for the entire monitor execution. If you want to set cookies only for a specific portion of your clickpath, you can use the Cookie event.
Click Add cookie. Then provide a Name and cookie Value. Every cookie must be unique within the list.
The following symbols are not allowed in the cookie value: ;,\". Provide the Domain of the cookie, and optionally, the Path to the cookie.
Common controls
This section describes controls that are common to several event types.
Amount of time to wait before the next event is triggered
While DESK automatically selects an appropriate wait time for each event, you can customize this setting to define how long DESK should wait before the next event is executed.
-
Wait for page to load completely waits for network activity to be completed after the load event is triggered. This is the default wait time used when loading a new page.
-
Wait for background network activity to complete waits for all network activity to be complete following the event. This is the default wait time used for XHRs and interactions within single-page applications.
This option is not available for Navigate events.
-
Wait for specific period of time allows you to specify the number of seconds that DESK should wait between this event and the next.
-
Wait for specific element to appear allows wait for a specific HTML element on the page by specifying the CSS or DOM locator for the element. You can also specify to text to validate against in the element, and a timeout for locating the element.
-
Wait for next event waits until one of the locators of the next event is found. This is basically the same as Wait for specific element to appear but automatically uses the locators of the next event.
Note: Be sure to specify a wait time that it doesn't exceed the programmed timeout values for browser clickpaths (see below). These timeouts can't be changed. A problem will be generated if one of these timeouts is exceeded.
- Script timeout:
5 minutes. - Event timeout:
60 seconds.
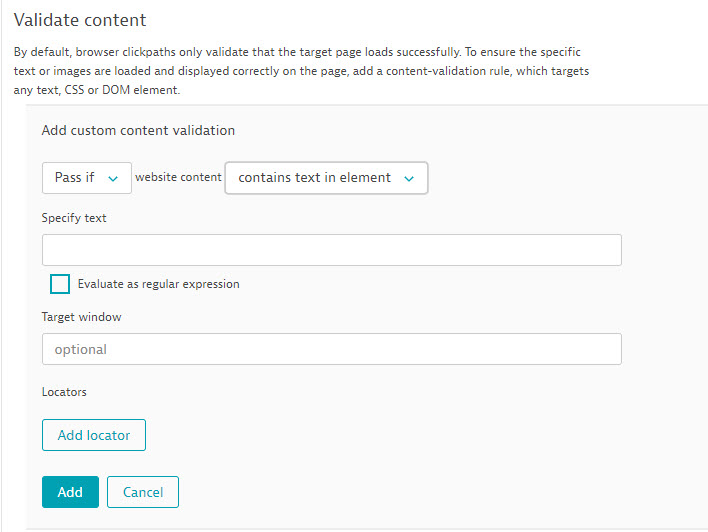
Validate content
Content validation helps to verify that your browser monitor loads the expected page content or element. Validations are performed through validation rules—click Add custom content validation to define a validation rule.
In browser clickpaths, you define validations for each event; for single-URL monitors, you define validation for the monitor as a whole as they each contain a single event. You can define as many validation rules for an event/monitor as you want.
You can validate based on specific text on a web page, a specific element, or text included within an element. You can opt to pass or fail your monitor/event based on your validation criteria. If pass criteria are not met (or fail criteria are met), the monitor/event fails and the execution is aborted.
All validation is performed after following all redirects, even if the very first response delivers HTML content.
You can add more than one validation to an event/monitor. If you have defined multiple validation rules, you can reorder and delete rules as required.
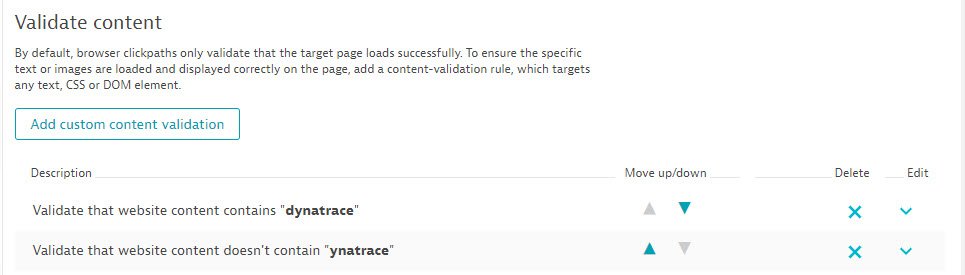
If your validation is based on content (contains text) or the markup for an element (contains text in element), you must provide the text string (Specify text). Optionally, you can specify text as a regular expression (Evaluate as regular expression). You can also specify the tab (Target window) in which the element should be found.
If your validation searches for an element (contains element) or the markup text for an element (contains text in element), you must specify the CSS Selector or DOM locators to use during replay—click Add locator, then select DOM or CSS, and provide the locator reference. You can add as many locators as you like.
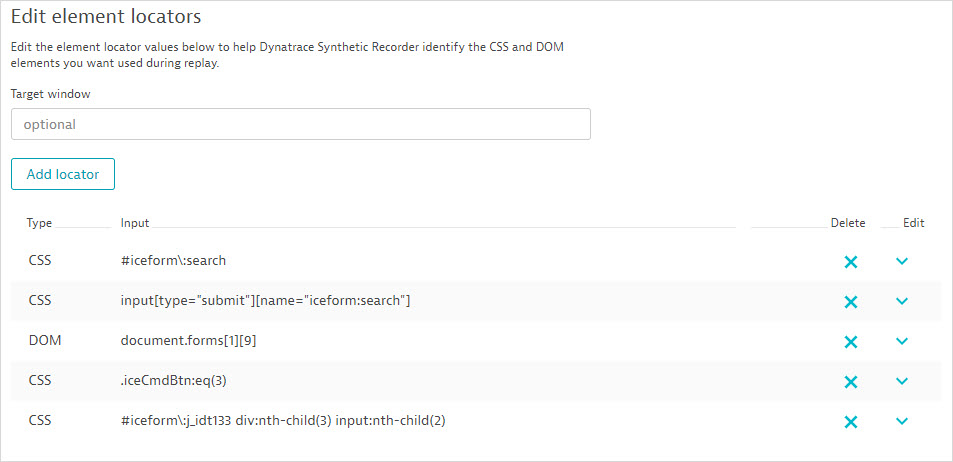
Edit element locators
This control is available in the Click, Tap, Keystroke, and Select option events.
When one of the above events in your clickpath targets a specific element on a web page, you can edit the element locators in either DOM or CSS Selector format. Locators help DESK identify the element during playback. Click Add locator, then select DOM or CSS, and provide the locator reference.
You can add as many locators as you like. You can also edit or delete any existing locators for your event.
Optionally, you can also specify the tab (Target window) in which the element should be found.