CORS Amazon S3?
Use these guidelines to set up CORS (cross-origin HTTP requests) in AWS for buckets within Amazon S3 (Simple Storage Service). To learn more about CORS and how it works, please see HTTP access control (CORS).
Introduction
Modern web browsers don't provide access to error information in window.onerror for scripts that are loaded across domains. This is a severe restriction that limits the usefulness of the DESK JavaScript error-detection engine.
Without CORS, instead of providing error details and a stacktrace when an uncaught JavaScript error is thrown, a message such as the follow appears:
"Script error" is usually reported when an exception violates the browsers same-origin-policy i.e. when the error occurs in a script that is hosted on a domain other than the domain of the current page. If the script is received with the CORS HTTP headers set, it is possible to get the full error details for most browsers by adding the attribute crossorigin="anonymous" to the script tag. Unfortunately Internet Explorer 11 and Edge do not currently support the crossorigin attribute. Care is also required to only set the crossorigin attribute for scripts with CORS headers present as otherwise the script will not be executed anymore.
In order to gain full visibility into thrown JavaScript errors, CORS HTTP headers must be set on the cross-domain servers and the crossorigin attribute must be applied to the script tag. Before performing this step, you must configure Amazon S3.
Configure Amazon S3
The first step is to input CORS settings for your resources on S3. This is done at the bucket level. Unfortunately, it's not possible to input CORS settings for individual resources within buckets.
-
Open the Amazon S3 console.
-
Locate the bucket that contains your resources and click it.
-
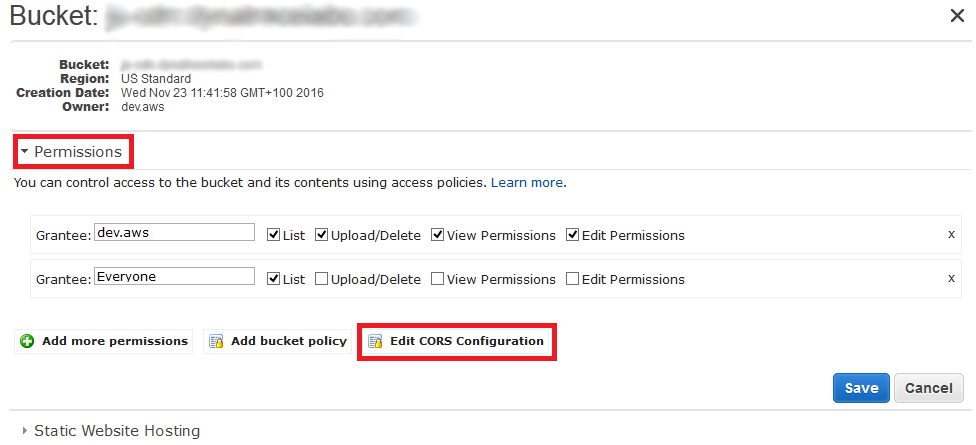
Click the Properties button in the upper-right corner of the page to display the Properties menu. Expand Permissions and click Edit CORS Configuration.
-
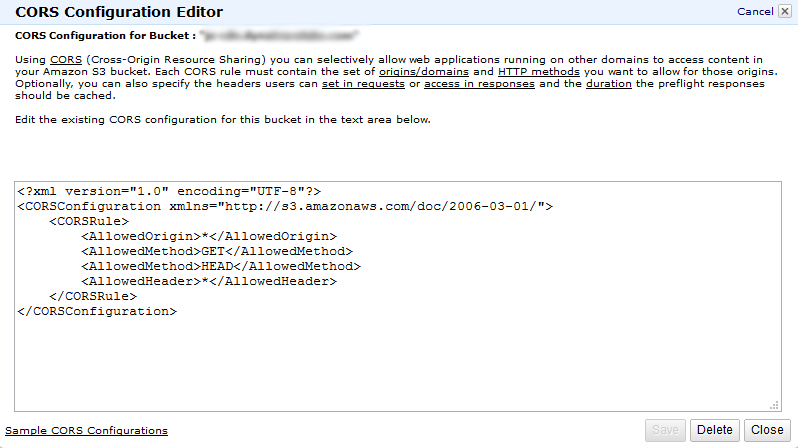
Within the CORS Configuration Editor you can describe CORS rules for particular buckets using an XML dialect defined by Amazon. The example rule below states that CORS is allowed across all domains (
AllowedOrigintag; asterisk symbol (*) means "any") for HTTP methodsGETandHEAD(AllowedMethodtag) and that all CORS headers are enabled (AllowedHeadertag). More rules can be defined. Individual rules are contained with in aCORSRuletag. All elements must be placed within anCORSConfigurationtag. For full details, please see descriptions of all allowable tags. -
Once you've prepared the XML, click Save. Then confirm the changes in the Permissions section by clicking Save again.
Configure CloudFront
With Amazon S3 configured, it's now time to enable CORS headers in CloudFront. Otherwise the headers will be filtered out and this mechanism won't work.
- Open the CloudFront console. You should see a window similar to that shown below. Find your distribution in the list and click its ID link. If necessary, use the search field (highlighted below in red) to search for your distribution.

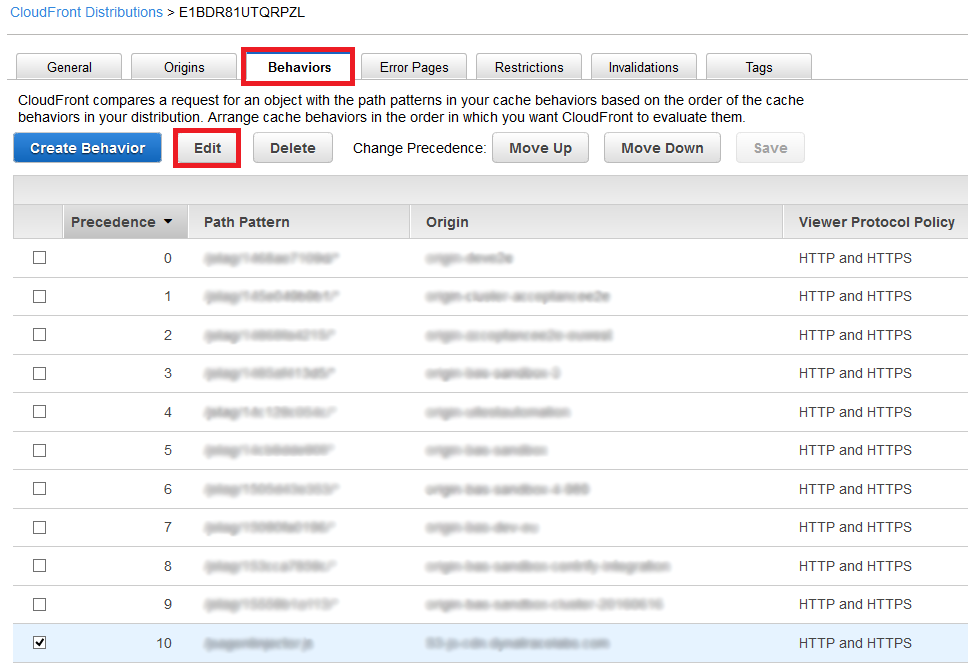
- Now you should see your distribution. Click the Behaviors tab. Find the behavior entry for your resource, described in the Path Pattern column. Select the pattern and click Edit. If the behavior entry doesn't exist, you must create it.
-
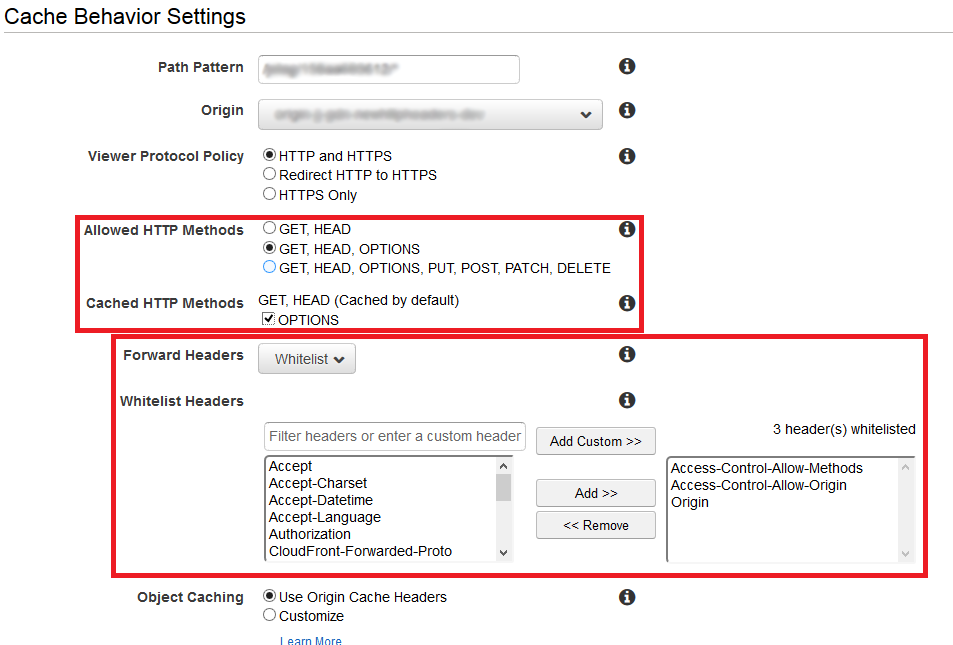
Now we can edit the behavior settings. All CORS-relevant elements are highlighted in red below. First you must choose which HTTP method will be available for this behavior. For Allowed HTTP Methods, it's recommended that you select the second or third option and check the OPTIONS checkbox, otherwise you won't be able to use CORS for REST calls, which use preflighted requests.
-
From the Forward Headers droplist, select Whitelist". You should then see the Whitelist headers menu. Select a particular header from the left listbox and click Add. If you don't see a particular header you can input it into Filter headers... textbox and click Add custom. For CORS, the most important headers are
OriginandAccess-Control-Allow-Origin. Other headers are optional and dependent on what you want to achieve. -
Confirm your changes by clicking Yes, Edit.