Configure Session Replay for personal data protection
To assist your organization in complying with the GDPR data protection laws enforced in the EU, DESK has introduced several Session Replay configuration settings that you should use to protect your customers’ personal information. Before enabling Session Replay and proceeding with the privacy configuration settings explained in this topic, ensure that your organization has taken all other necessary steps to protect your customers' personal data.
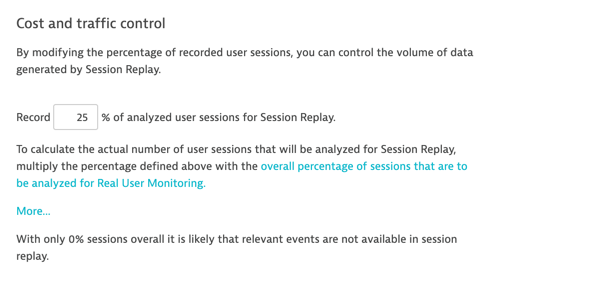
Cost and traffic control
The Cost and traffic control setting can be used to reduce usage while recording user sessions.
By default, DESK captures all user actions and user sessions for analysis, which ensures complete insight into your application's performance and customer experience. With this setting, you can choose to reduce the granularity of user-action and user-session analysis by capturing a lower percentage of user sessions.
While this setting reduces monitoring costs, it also results in lower visibility into how your customers use your application. For example, a setting of 10% results in DESK analyzing only every tenth user session.
To limit the number of sessions recorded by Session Replay:
-
Select Applications from the navigation menu.
-
Select the application that you want to configure.
-
On the Application overview page, click the browse [...] button on the upper-right corner and select Edit.
-
On the Application settings page, select the Session Replay tab on the left.
-
Enable the Session Replay setting.
-
Type a value less than 100% in the Analyze % of user sessions field.
Session Replay opt-in mode
Session Replay opt-in mode gives you the freedom to decide which parts of a user session must be recorded and when recording is permitted to begin. For example, you may choose to record user sessions:
- As soon as any user logs in
- Only for select customers so that you can offer them premium support
- Only for certain pages of the recorded application
When you enable Session Replay opt-in mode for your web application, recording of the active user session begins only once you invoke the enableSessionReplay() method on the dtrum global object. The dtrum global object is available following the auto-injection of the Real User Monitoring JavaScript tag.
This command starts session recording and creates a session cookie that stores the current replay state so that Session Replay remains active and recording begins automatically on all subsequent pages visited during the same session. This eliminates the need to call dtrum.enableSessionReplay() for each page visited during a single session.
The dtrum.enableSessionReplay() method includes the ignoreCostControl parameter, which can be used to record certain user sessions by disregarding the value in Cost and traffic control.
When Real User Monitoring opt-in mode is enabled, the same cookie is applied to Session Replay opt-in mode. In this case, Real User Monitoring must be enabled before you can enable Session Replay:
dtrum.enable()
dtrum.enableSessionReplay()
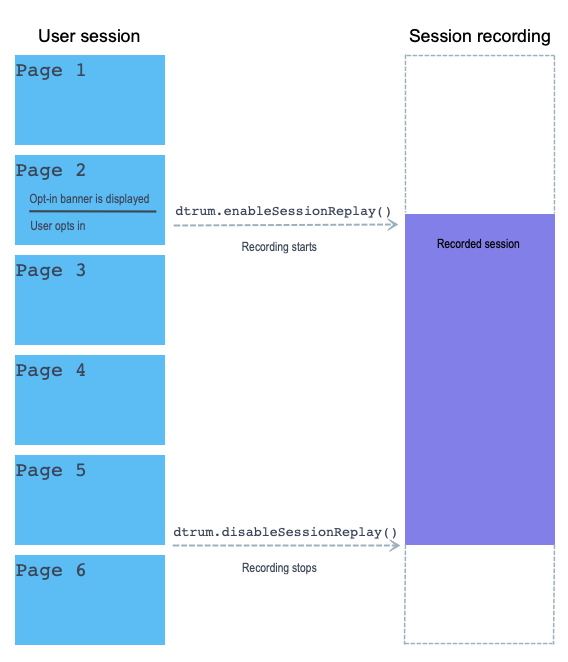
Consider the following scenario: As an application owner, you want to record all user sessions that include Page 2 through Page 5 of your application. Session activity involving Page 1 or Page 6 of your application are to be excluded from recording. The following diagram illustrates where the dtrum.enableSessionReplay() and dtrum.disableSessionReplay() methods are required in such a sequence.
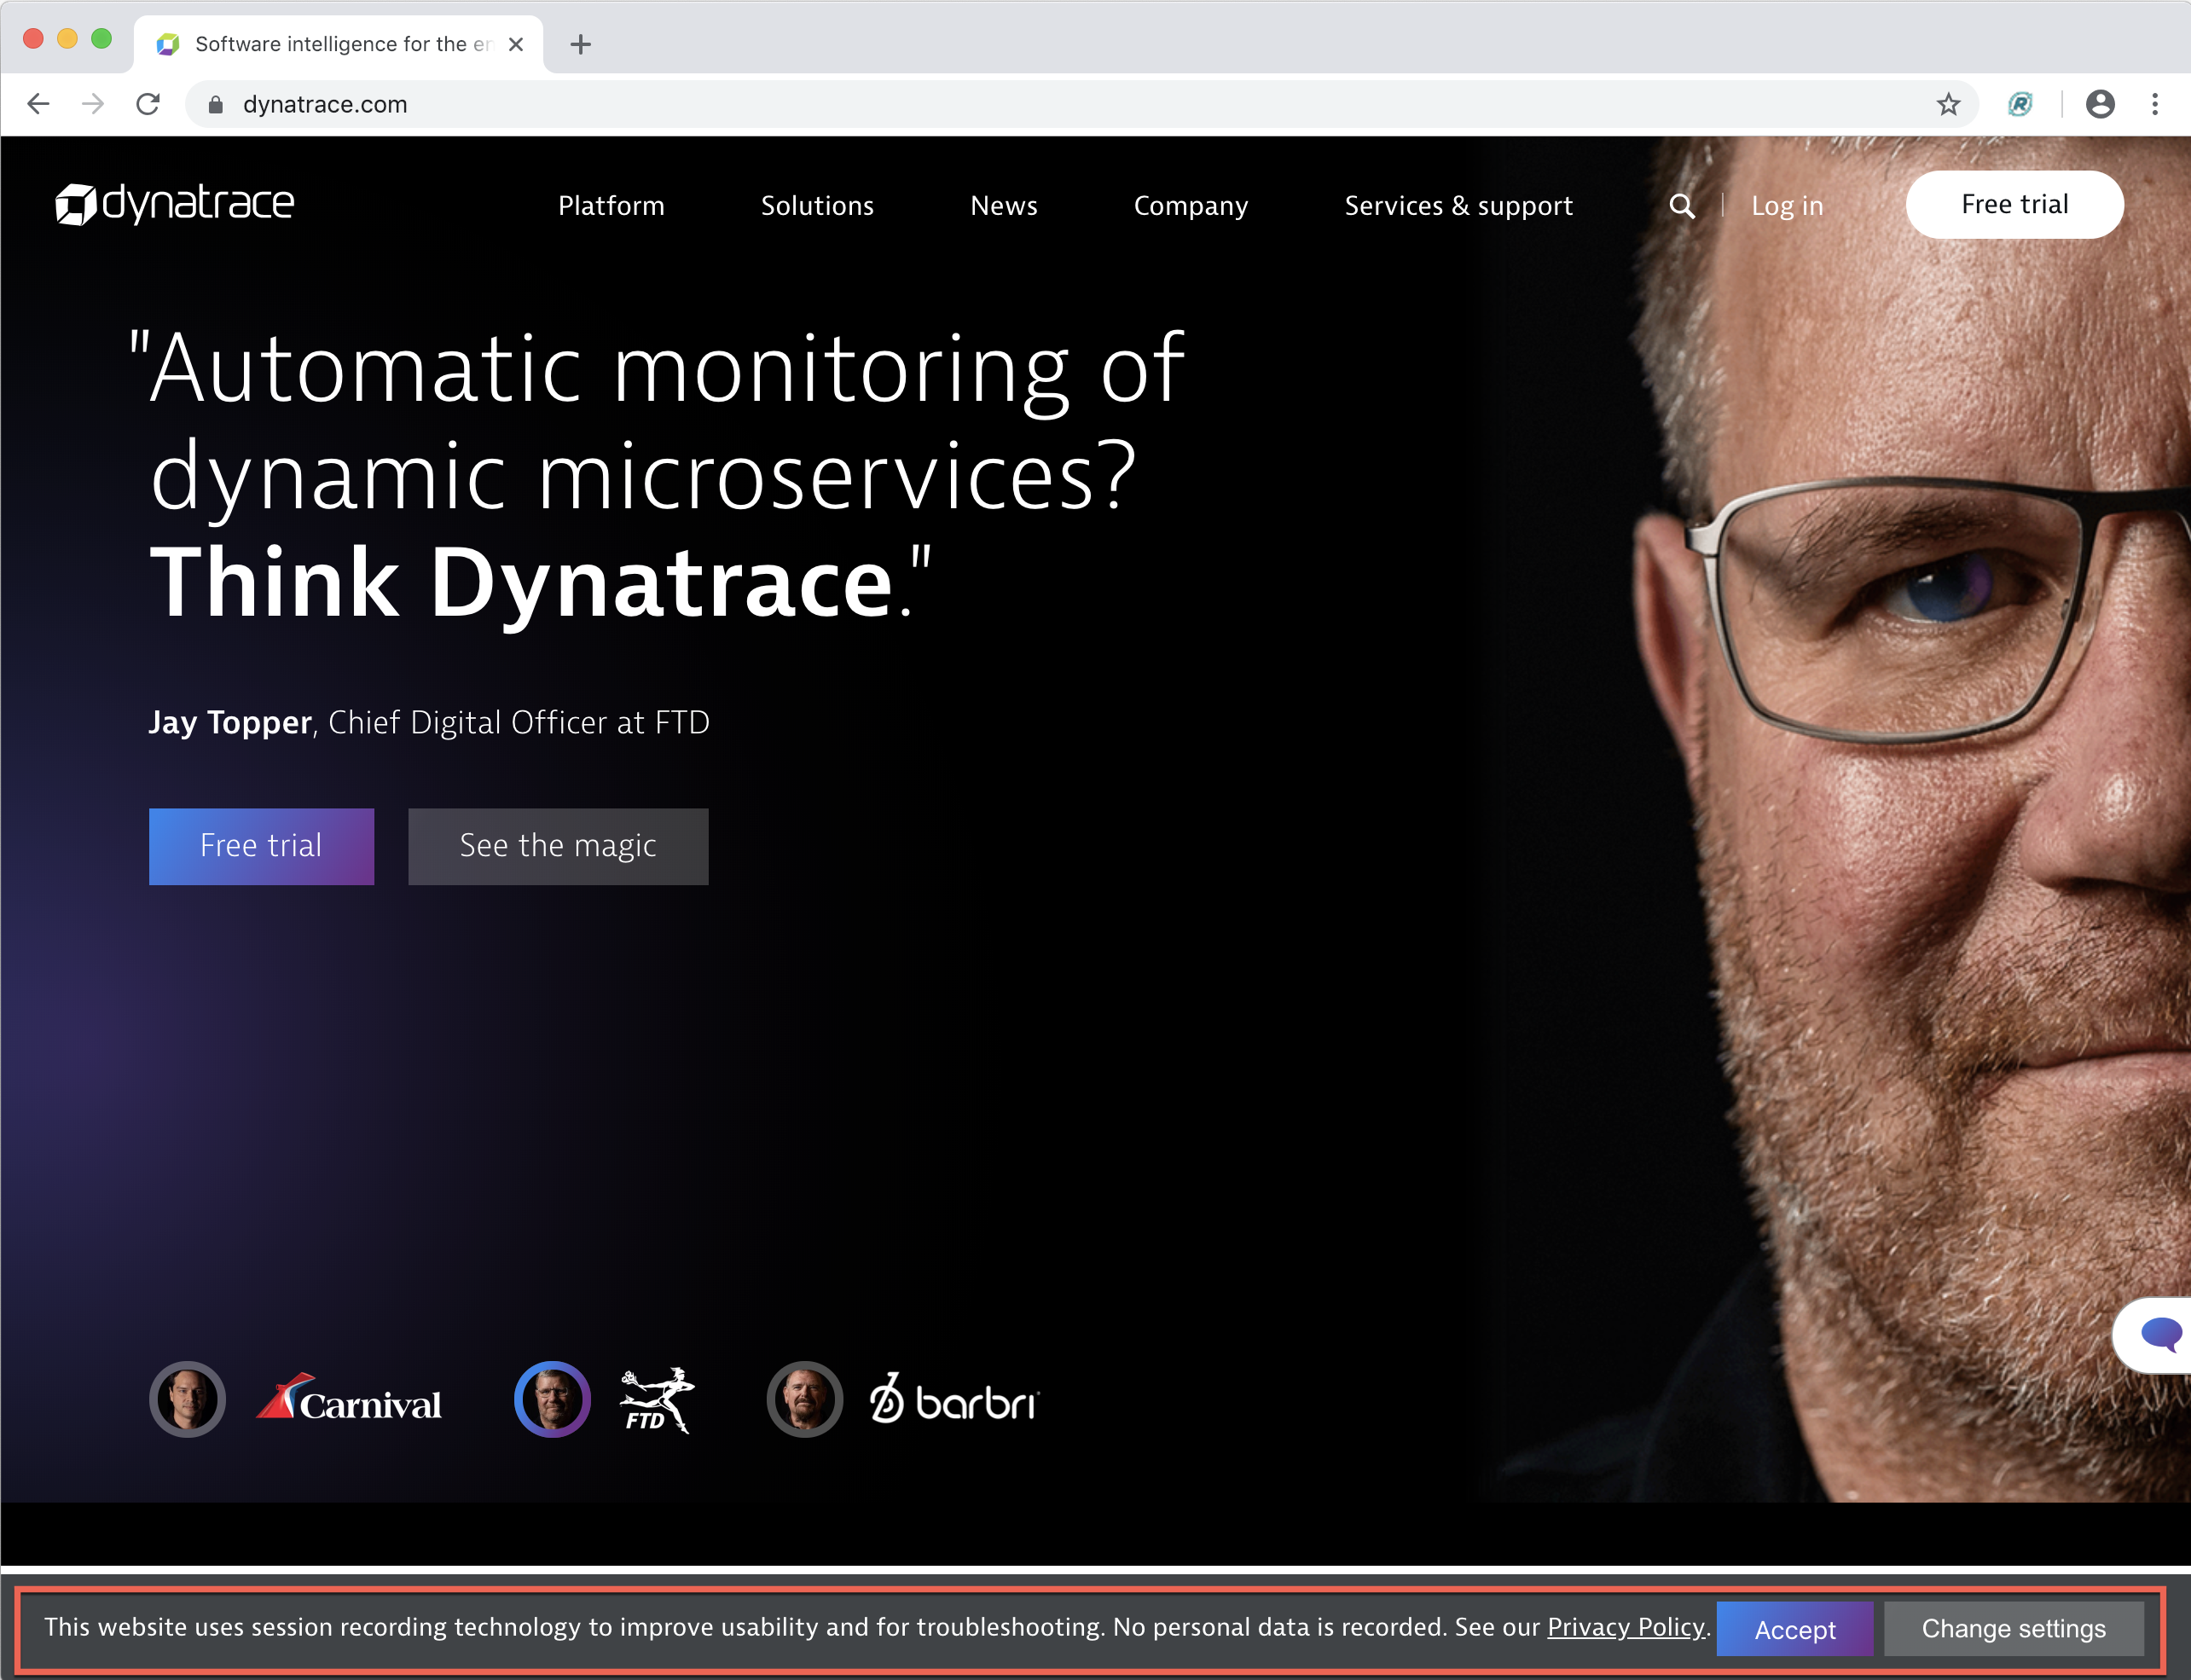
Opt-in consent banner
In such cases, you can display a consent banner to enable session recording when the user lands on Page 2 (see callout at the bottom of the following image). When the user clicks the Accept button to allow session recording, the application responds by invoking the dtrum.enableSessionReplay() method and recording the session.
You can use a cookie in your application to record user content history within the browser. The content of this cookie is checked during each session to determine if the consent banner must be displayed. For example, if the cookie that stores the consent is named sessionReplayConsent, the application flow would be something like this:
- The application checks the value of the
sessionReplayConsentcookie. - If the value is
true, thedtrum.enableSessionReplay()call is invoked. - If the value is
false, the consent banner is displayed. - If the user provides their consent, the
dtrum.enableSessionReplay()call is invoked. - User consent is written to the
sessionReplayConsentcookie.
With this cookie, Session Replay continues to remain active until Page 5 of the application.
Once the user leaves Page 5, the dtrum.disableSessionReplay() method can be used to stop recording the session. The cookie that has been used to store the consent must then be removed.
Note: JavaScript methods used for enabling and disabling Session Replay can be used without displaying a banner to obtain consent. For example, if you wish to record a session each time any user logs in, you can use the dtrum.enableSessionReplay() method to start recording and the dtrum.disableSessionReplay() method to stop recording following successful logout. This gives you complete control over start and stop of Session Replay.
Session Replay opt-in mode is disabled by default.
To enable the opt-in mode
-
Select Applications from the navigation menu.
-
Select the application that you want to configure.
-
On the Application overview page, click the browse [...] button on the upper-right corner and select Edit.
-
On the Application settings page, select the Session Replay tab on the left.
-
Enable the Session Replay setting.
- Scroll down to the Privacy settings section and turn on the Enable the opt-in mode for Session Replay setting.
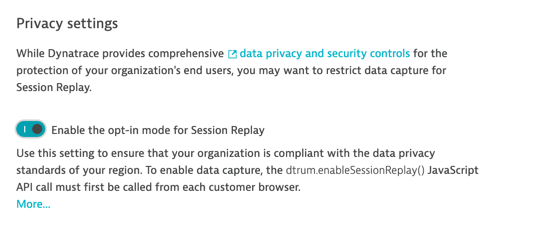
- Click Save.
With these configuration settings, Session Replay is inactive in your end-users' browsers and sessions won't be recorded until the dtrum.enableSessionReplay() method is called from the application.
Note: If you choose to not turn on the Enable the opt-in mode for Session Replay setting, all user sessions will be recorded from the beginning until dtrum.disableSessionReplay() is called from the application.
Session Replay content and interaction masking
Session Replay records every user interaction. Therefore, protecting sensitive user data is of utmost importance.
To protect this sensitive data, Session Replay implements content masking. All sensitive content in your web application can be masked in such a way that the original content is inaccessible. So, when you replay a recorded user session within which an end user has typed in some personal data, asterisks are displayed in place of the original data.
Note: Only alphanumeric data is masked. Special characters such as periods, commas, and colons aren't masked.
As an example, consider an email address field on a typical web form. The user types in their email address, as shown in the following image:

Session Replay masks this data and displays asterisks in its place:

Session Replay also provides masking functionalities that can be used to hide interactions with elements that may inadvertently reveal sensitive end-user information. For example, think of a select box that provides multiple options for responding to a form question about the user's religion or gender. Even with the text masked, the end user's response could be easily deduced by seeing which option box they selected.
To address such situations, the recorder masks any element, whether a form field or a content node, that contains the attribute data-dtrum-mask. In the presence of such an attribute, all mouse and touch interactions are ignored. Additionally, the node and all its descendants will have their text and input values masked.
Note: The masked data displayed as asterisks ***** in the replayed session never leaves the client browser.
Default masking settings
By default, masking is applied as follows:
- All form fields are masked.
- All password fields are masked.
- Content masking is disabled.
- Attribute masking is disabled.
- Interaction masking is enabled for select form fields, such as gender selection drop-down option lists.
Configurable masking settings
To protect your customers’ sensitive information, you can apply a combination of configuration settings. DESK will use your custom configuration settings to identify the data that must not leave the user’s browser or be sent to DESK Server.
There are several masking options that can you can configure to selectively mask sensitive data:
In most cases, all sensitive data is typed by users into web form fields. This is why all input fields are masked by default. The masking algorithm maintains the format of the data but masks the data itself. For example, email address fields are masked as shown here:
Session Replay configuration settings enable you to either:
- Mask all form fields
- Mask only those form fields that have sensitive data
Note: Irrespective of your configuration, password fields are always masked by default.
To configure Session Replay configuration settings
- Select Applications from the navigation menu.
- Select the application you want to configure.
- Click the browse [...] button in the upper-right corner.
- Click the Edit button.
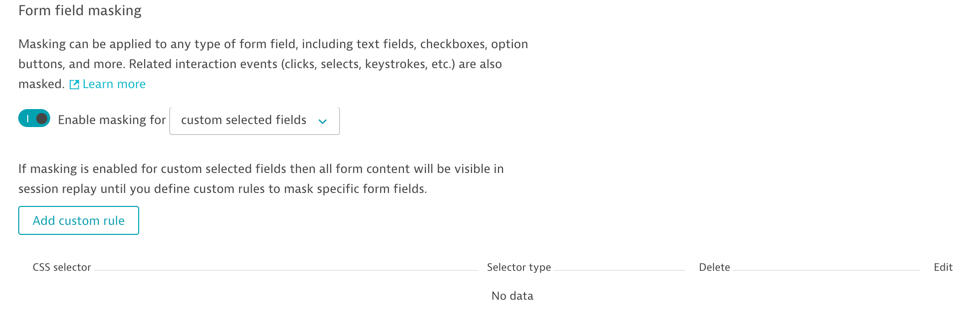
- Select the User session record & replay tab and scroll down to the Form field masking section.
- Configure settings as required based on the following example.
Form field masking example
Our easytravel sample website enables simulated customers to book flights and reserve hotels. To confirm bookings, users must log in and enter the details of the credit card that will be used to make the purchase. All this sensitive data must be masked.
Note: If these configuration settings can't mask all input fields in your application, you can also define CSS rules to mask fields that contain sensitive data.
- To find the correct CSS selector for the fields you want to mask, use developer tools, inspect the element that must be masked, and copy the CSS selector.
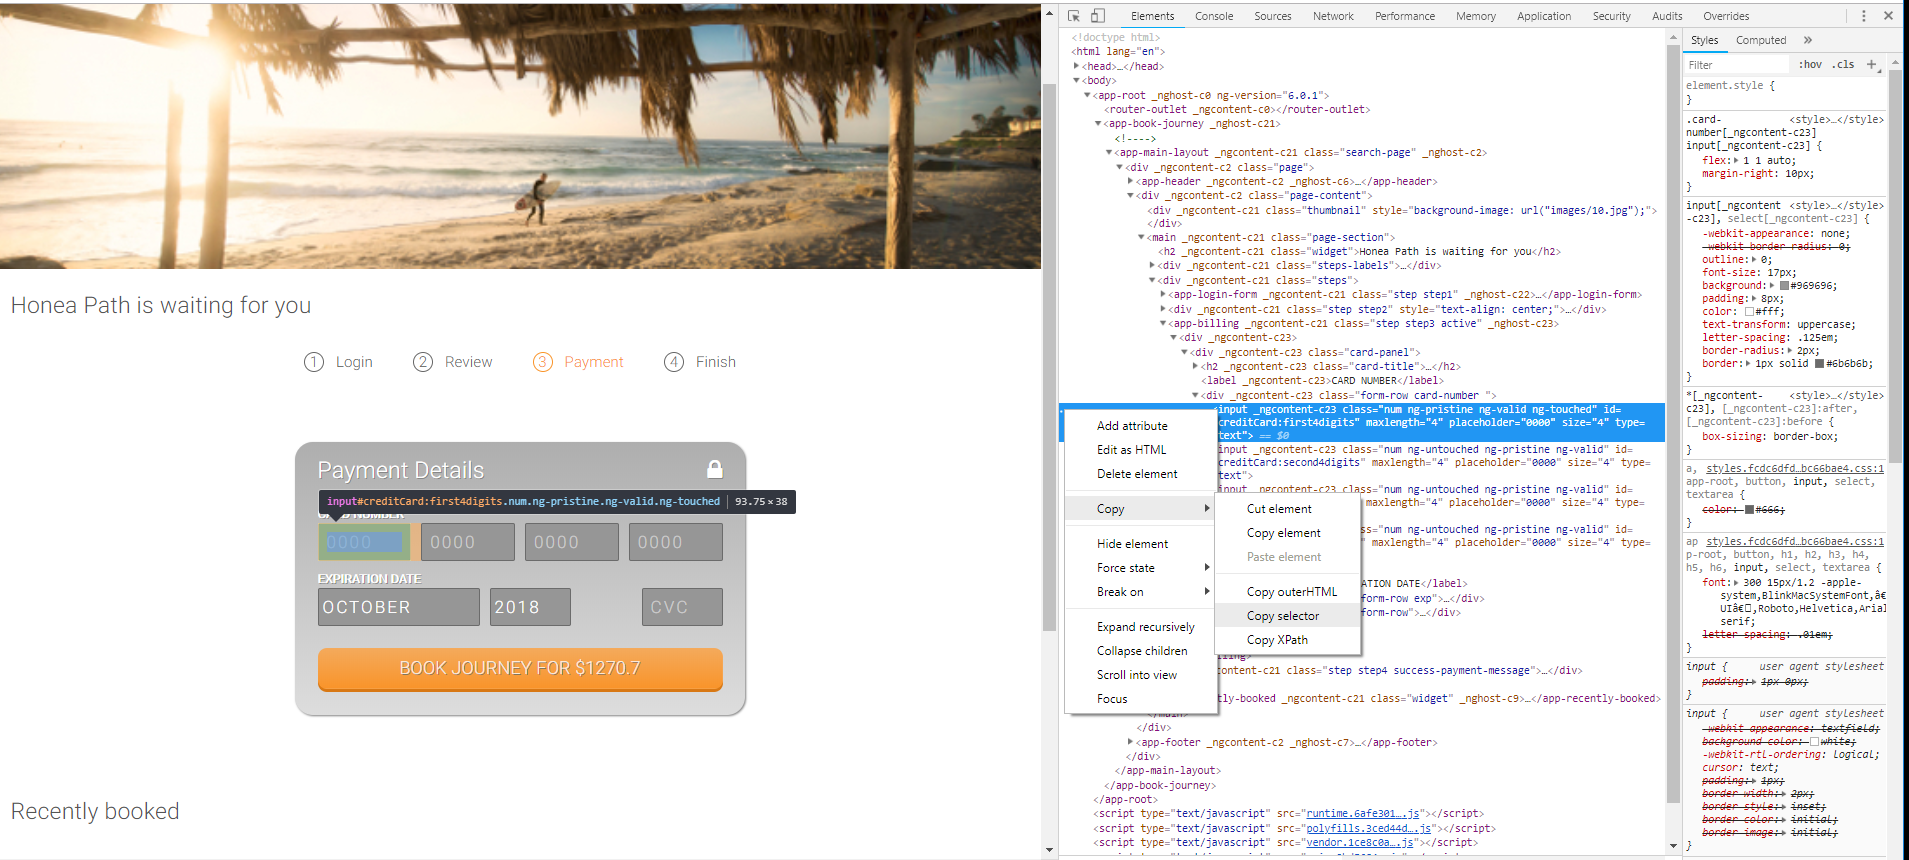
- Add the selector to the form field custom rules.
Note: You can add as many rules as you want.
Alternatively, you can create only one rule that applies to multiple elements. For example, say you want to mask all input fields under class="form-row card-number" and class="form-row exp", both of which are part of class="card-panel".
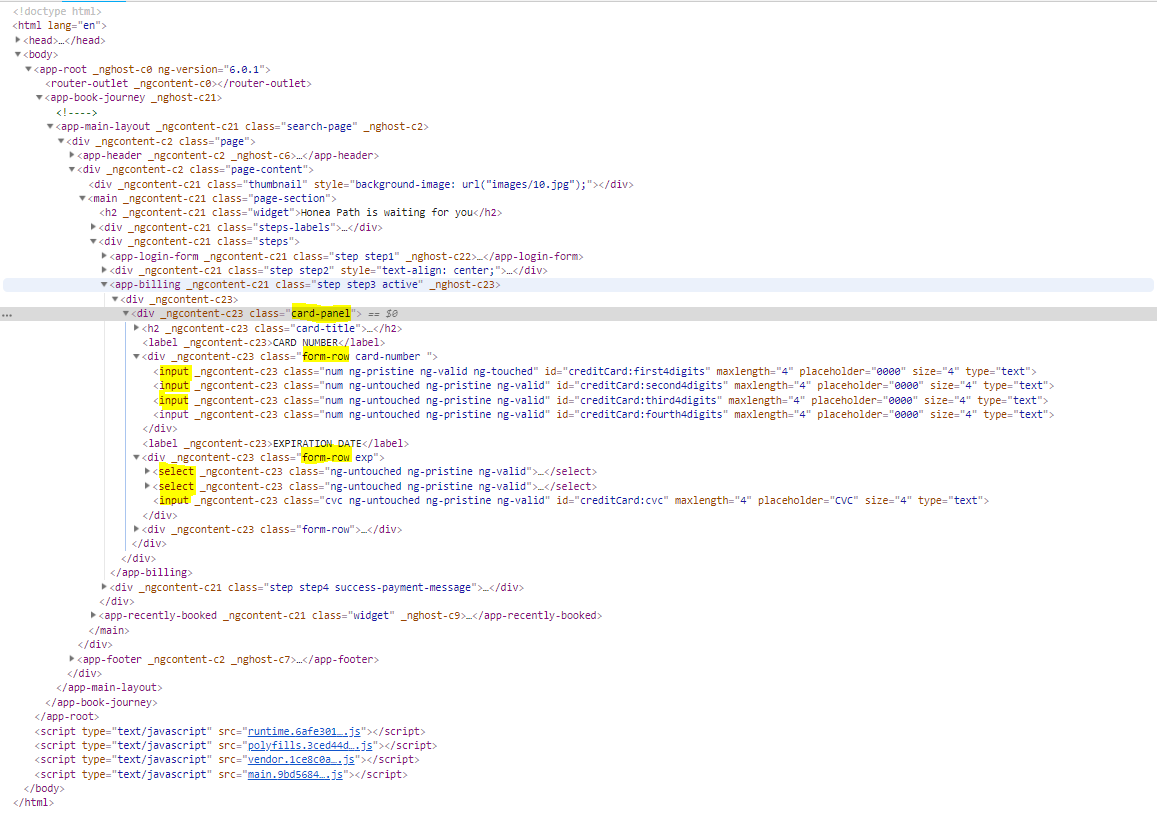
Instead of masking these 7 fields with 7 different rules, you can mask them using only two rules:
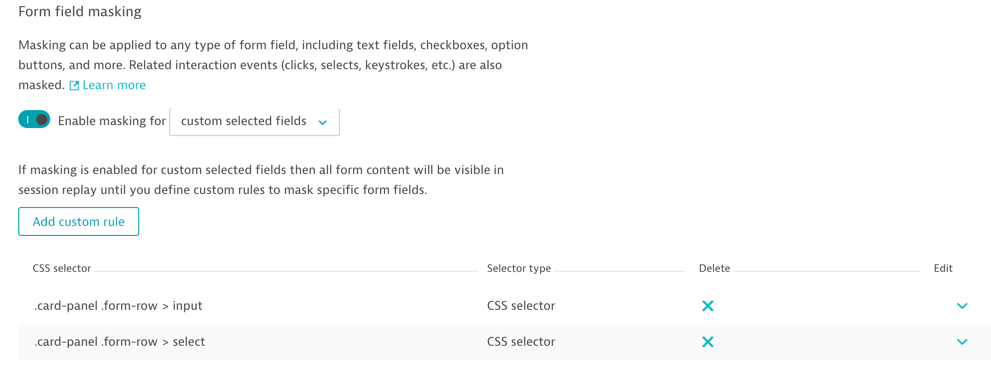
card-panel .form-row > input(for input fields)card-panel .form-row > select(for select fields) You can also validate the CSS selectors with developer tools.
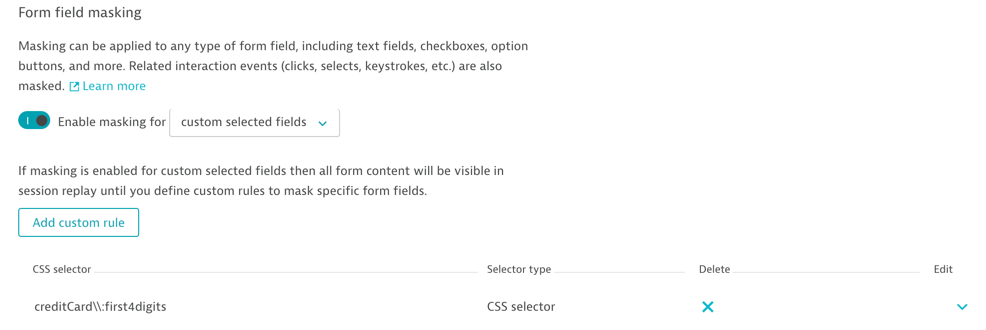
- After the CSS selector rules are validated, add them to the form field masking configuration.
Note: DESK recommends marking form fields that contain sensitive data with a custom property, such as data-privacy="true" or a CSS pseudo class. This allows you to create a few simple rules for masking and works reliably even in the case of new releases of your web application. For example, the recorder will mask all elements, including form fields and content nodes, that use the attribute data-dtrum-mask. You can even include the definition of personal data within the web application implementation process.
Test your form-field masking configuration
- Record a session.
- Use
dtrum.identifyUser('userNameToFilterFor'). - Wait until the session has been processed. This takes about 2 minutes.
- Filter the data by using
User Tag = userNameToFilterForand find your session. - Play the session to verify that all sensitive data is correctly masked.
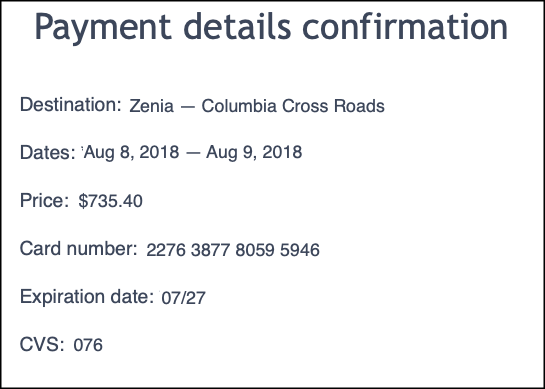
Content masking is applied to personal data that is picked up from masked input fields on a web form and displayed on a different web page. An example of this is the confirmation page that is displayed after a user has entered data in previous form fields.
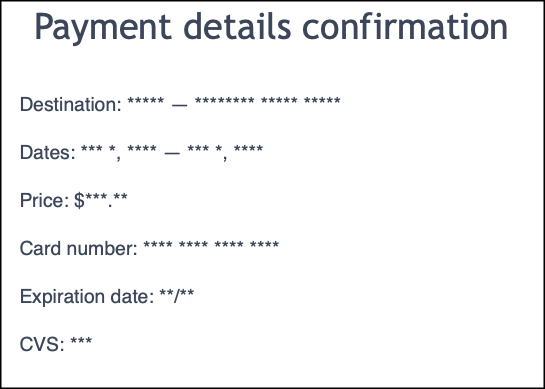
After content masking is applied, the screen looks like this:
To configure content masking so that the data collected from the user isn't displayed during Session Replay, add CSS selectors in the Content masking section.
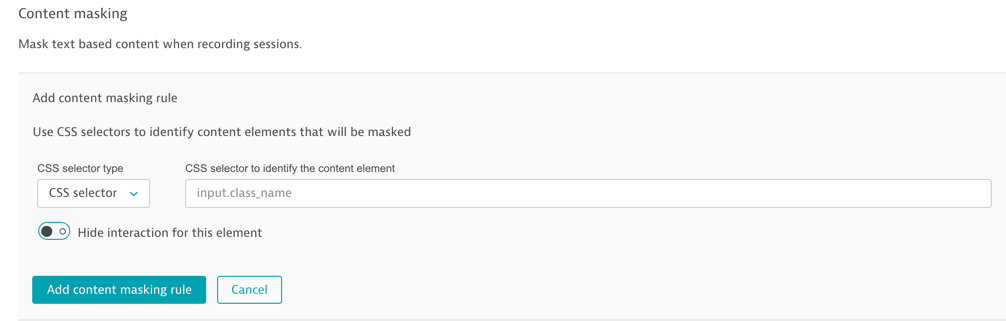
When you're defining the rule, you can additionally choose to hide user interactions (for example, mouse movements and clicks) within form elements by enabling the Hide interaction for this element setting.
Note: The masking is applied to the element that matches the CSS rule and all its descendants.
-
To find the correct CSS selector for the fields that you want to mask, use developer tools, inspect the element that must be masked, and copy the CSS selector.
-
Add the selector to the form field rules.
Note: You can add as many rules as you want.

- You can also create one rule to select multiple elements.
Test your content masking configuration
- Record a session.
- Use
dtrum.identifyUser('userNameToFilterFor'). - Wait until the session has been processed. This takes about 2 minutes.
- Filter the data by using
User Tag = userNameToFilterForand find your session. - Play the session to verify that all sensitive data is correctly masked.
Attribute masking is particularly applicable to data-NAME attributes that were introduced in HTML 5 to carry application-specific information.
With attribute masking, you can specify attributes for which values must not be recorded.
-
Define a regular expression that matches the attribute name.
-
Add the expression to the attribute masking rule.

The values of defined attributes are excluded from recording and aren't sent to DESK Server.
Test your attribute masking configuration
- Record a session.
- Use
dtrum.identifyUser('userNameToFilterFor'). - Wait until the session has been processed. This takes about 2 minutes.
- Filter the data by using
User Tag = userNameToFilterForand find your session. - Play the session and check the developer tools to verify that all sensitive data is correctly masked.