Manage your monitoring environments
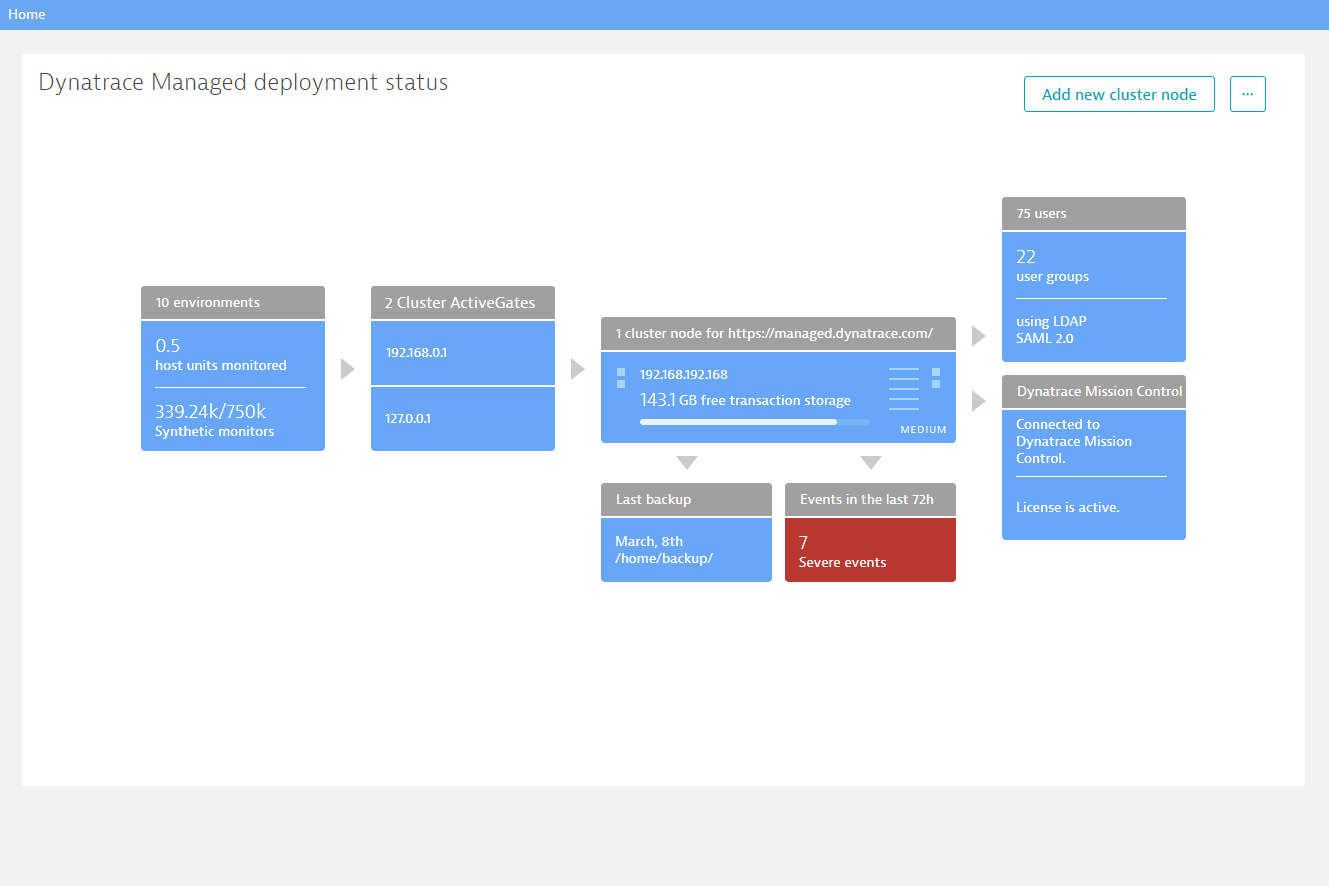
You can easily create and manage your monitoring environments using the Cluster Management Console.
Create an environment
- Select Environments from the CMC menu.
- Click the + Add another environment button.
- In the Environment name text box, type in a name for your environment.
- You can optionally disable synthetic monitors by setting the Enable synthetic monitors switch to the off position.
- Click Save.
Configure an environment
After creating an environment and clicking Save, you are directed to the environment’s configuration page. You can however access an environment's configuration page at any time, by selecting Environments from the navigation menu and clicking the environment you want to configure.
On the configuration page, you can set the total as well as the monthly and annual quotas for your environment.
Total environment quotas
- Host units - The size of a host for licensing purposes (based on the amount of RAM provided by a host). For full-stack monitoring, a host with 16 GB of RAM (or any portion thereof) equates to 1 host unit. For cloud-infrastructure monitoring, a host with 16 GB of RAM (or any portion thereof) equates to 0.3 of a host unit.
For full details, see How to calculate monitoring consumption. - Custom metrics - Number of unique timeseries metrics in a 24-hour sliding window.
For full details, see How to calculate monitoring consumption.
Monthly and annual quotas
- User sessions - Number of user sessions (i.e., "RUM sessions") to be monitored per month/year.
For details, see How to calculate monitoring consumption. - Synthetic monitors - Number of synthetic monitors to be performed per month/year.
For details, see How to calculate monitoring consumption. - Avg. daily log volume - Volume of Log monitoring traffic per month/year.
For details, see How to calculate monitoring consumption.
Also, you can configure the storage settings, which include:
- Transaction storage - Volume of disk space to be reserved for transactions (for example, service calls, call stacks, and SQL statements).
- Symbol files from mobile apps - Amount of storage that can be consumed by the symbol files from mobile apps.
- Service request level retention - Amount of time the disk space for a service request is to be retained.
- Service code level retention - Amount of time the disk space for code-level visibility is to be retained.
- Real user monitoring retention - Amount of time the disk space for user sessions is to be retained.
- Synthetic monitoring retention - Amount of time the disk space for synthetic monitors is to be retained.
- Session Replay retention - Amount of time the disk space for Session Replay data is to be retained.
- Log Monitoring storage - Volume of disk space to be reserved for Log Monitoring.
- Log Monitoring storage retention - Amount of time the specified disk space for Log Monitoring is to be retained.
Once any one of these limits is consumed, the respective monitoring will no longer be available and you'll need to purchase more monitoring. To purchase DESK monitoring, contact DESK Sales. Your sales representative will provide you with further details.
Assign environment permissions to user groups
Use these controls to assign environment permissions to defined user groups.
For details, see Manage user groups and permissions.
Rename an environment
- Select Environments from the navigation menu.
- Select the environment you want to rename.
- Click the small pencil icon next to the environment's name.
- Type in the new name and click the tick mark button.
Disable/delete an environment
- Select Environments from the navigation menu.
- Select the environment you want to disable/delete.
- Click the Browse (...) button in the upper right corner.
- Select Disable environment or Permanently delete environment.
Access an environment
To access an environment from your DESK Managed administration page:
Select Environments from the navigation menu.
Select the environment you want to access.
Click the Go to environment button in the upper right corner.
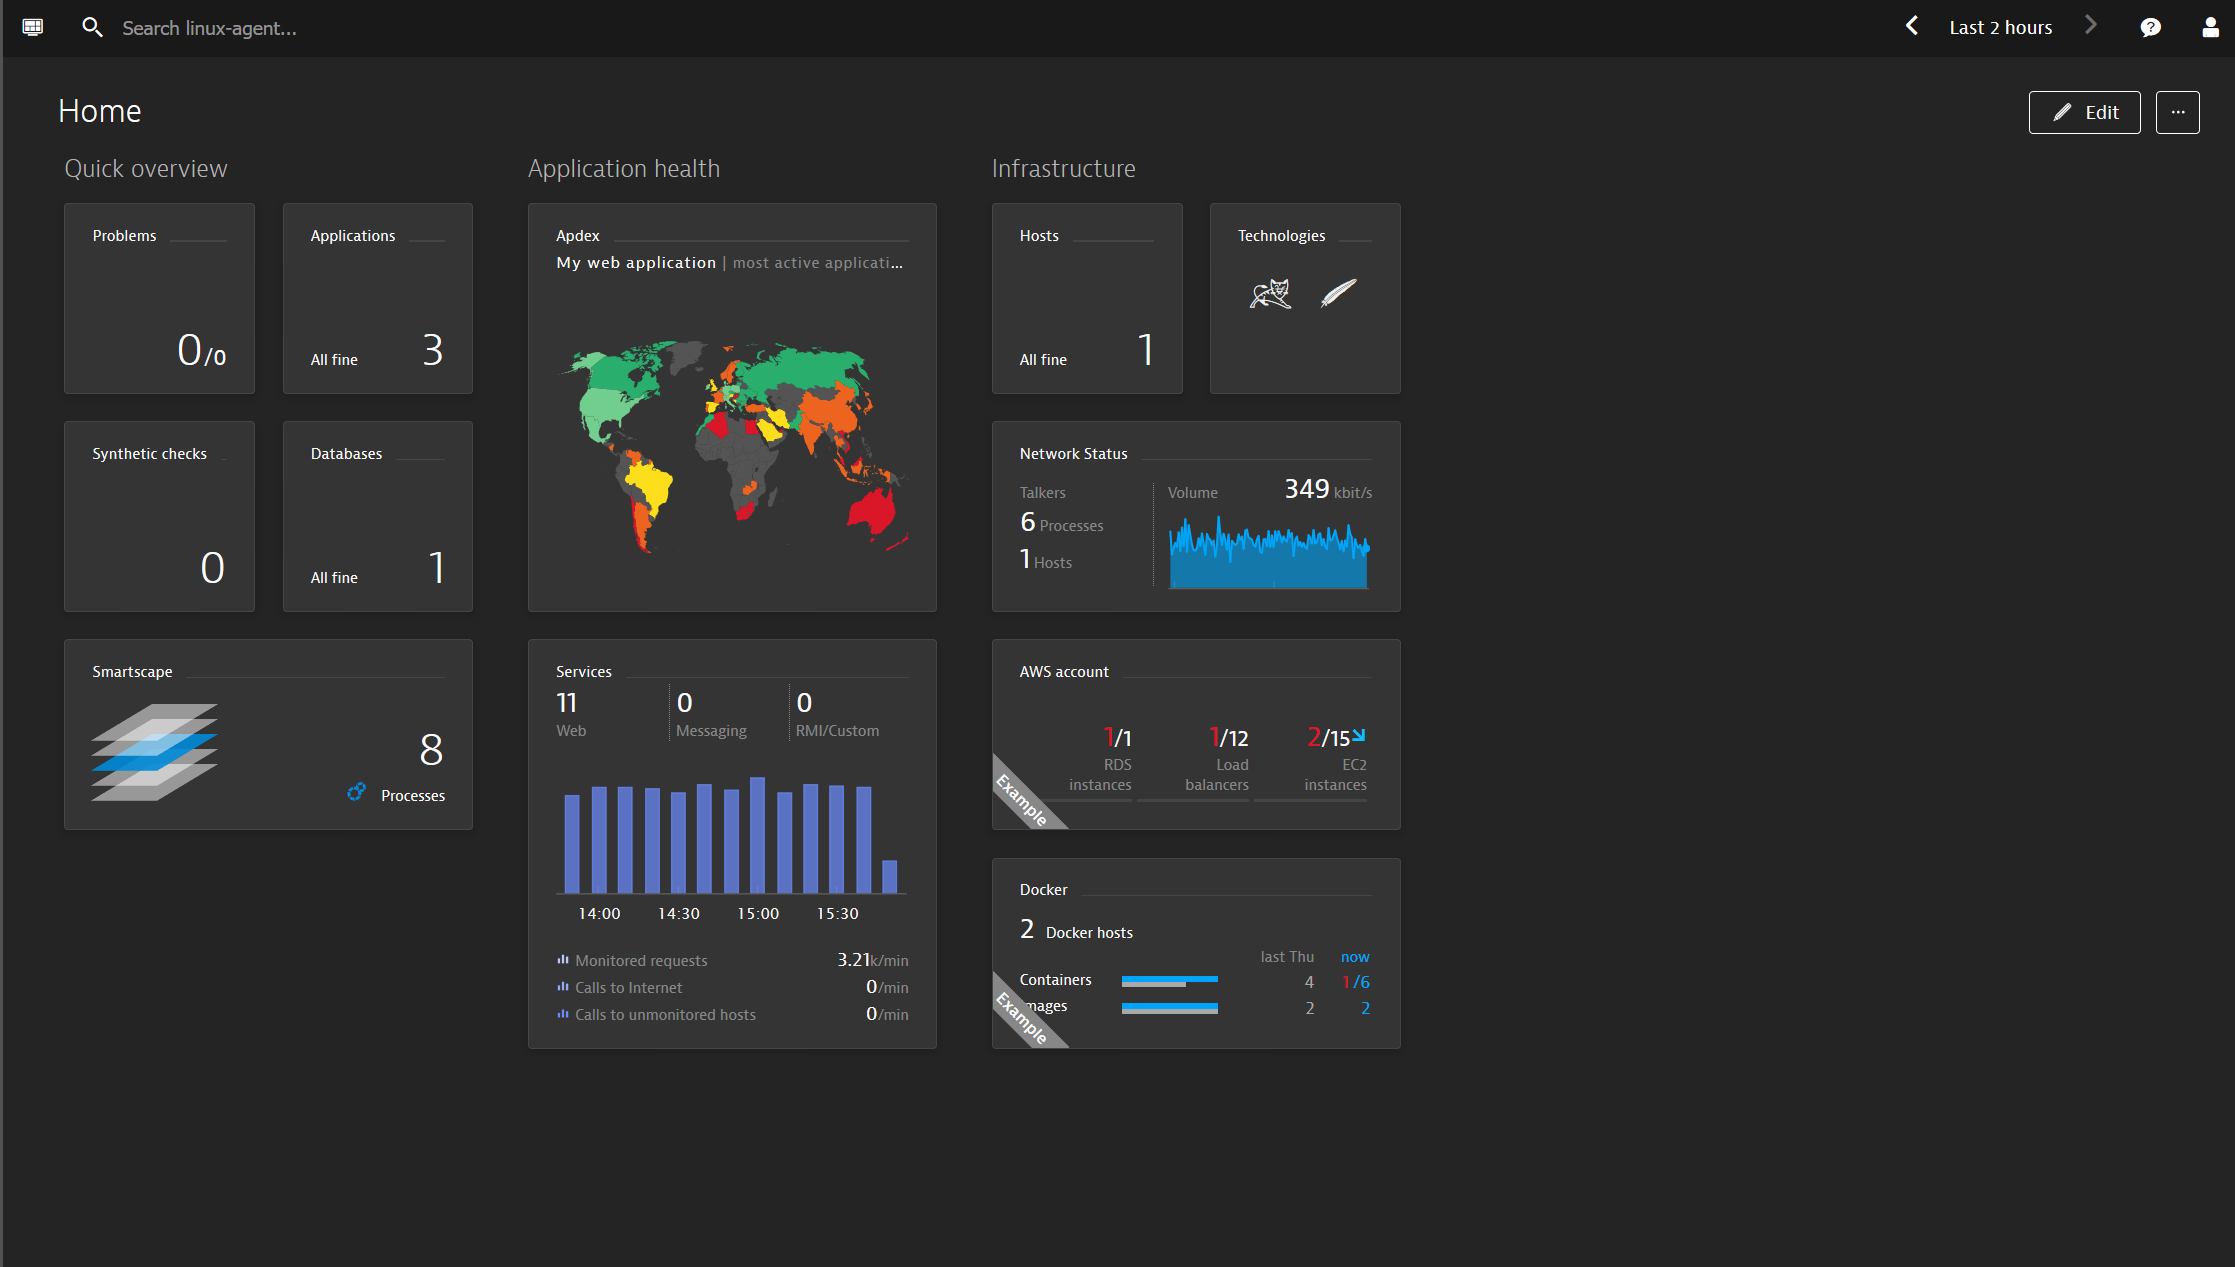
The monitoring data related to selected environment are displayed on your home dashboard.
To access an environment from your DESK Managed administration page another way:
Open the User menu by clicking the User icon in the upper-right corner.
Open the Cluster Management drop list.
Select the environment you want to access.
To return to your Cluster Management Console at any time:
From dashboard view, open the User menu by clicking the User icon in the upper-right corner.
Click the environment’s name to open the drop list.
Select Cluster Management.
Switch between environments
While on the dashboard view of a specific environment
- Open the User menu by clicking the User icon in the upper-right corner.
- Click the environment’s name to open the drop list.
- Select another environment you want to access.